-
Notifications
You must be signed in to change notification settings - Fork 12
How to use BITalino HeartBIT with SSJ
- Android Smartphone (Version >= 4.1)
- BITalino HeartBIT
- Depending on the intended use case:
- The SSJ Creator app (search for "ssj sensor data processing" in Google Play Store) provides a graphical user interface which enables the creation of processing pipelines without writing a single line of code. For this method see Section 3.
- The SSJ framework provides a programmable interface for creating processing pipelines directly with code which can be used in your own apps. For this method see Section 4.
Independent of the chosen method, the following steps need to be performed for preparation:
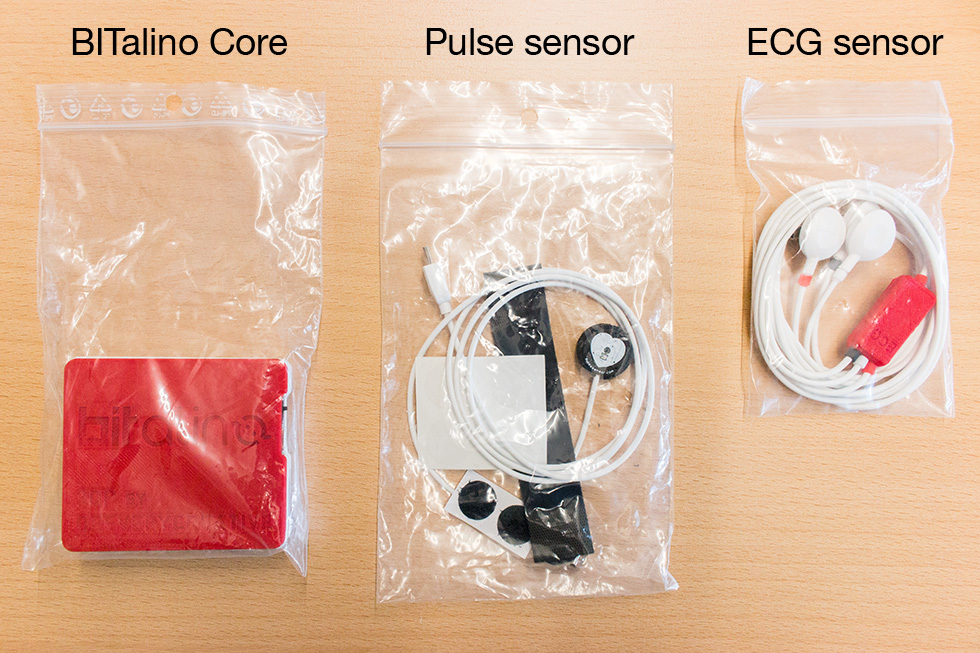
The BITalino HeartBIT consists of the BITalino Core unit and includes a Pulse sensor as well as an ECG sensor:
Due to its easier usage we will focus on the pulse sensor in this guide but all concepts discussed here also apply to the ECG sensor.
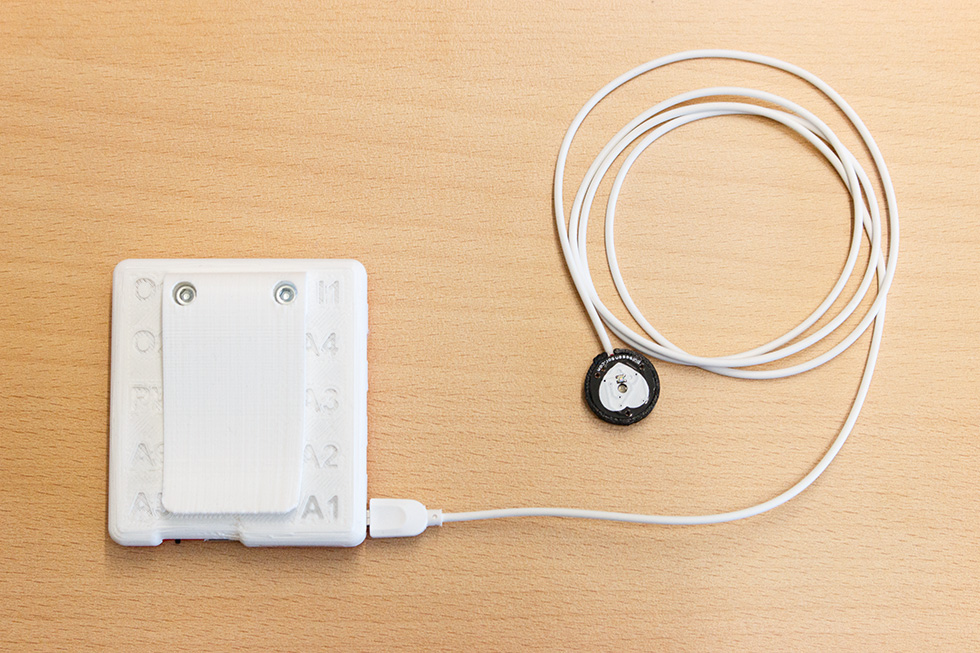
In order to prepare the pulse sensor, connect the cable to one of the six analog ports (named A1-A6) of the BITalino Core like so:
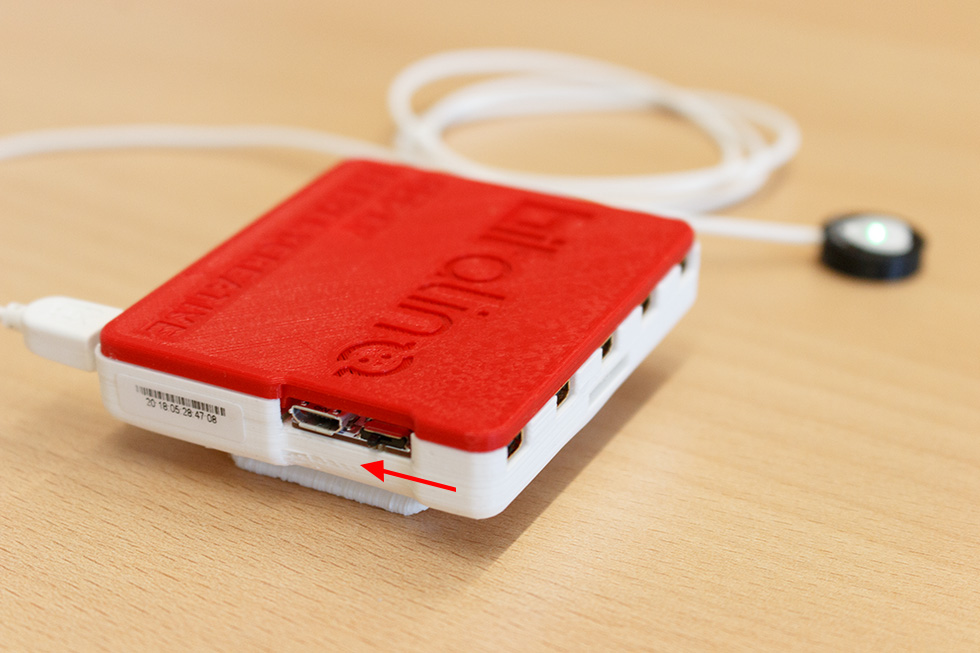
Afterwards, turn on the BITalino Core (the integrated LED should start blinking slowly):
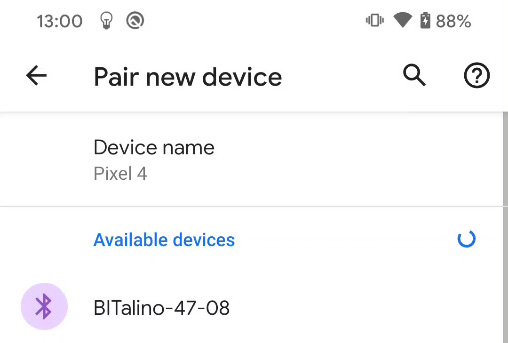
Enable Bluetooth on your smartphone (usually in Settings) and search for Bluetooth devices to pair with. You should see a device called BITalino-XX-XX (X = numbers). Pair your smartphone with it (use 1234 as default PIN).
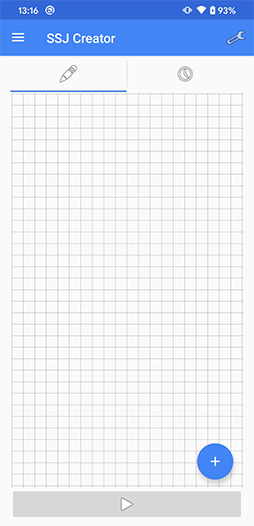
You can download the SSJ Creator app from the Google Play Store. Alternatively, you can build the app from the source code provided in the GitHub repository. If you launch the app for the first time please grant all required permissions to it. After launching the app you should see the following screen:
In general, a pipeline consists of multiple components such as Sensors (provide data to the pipeline), Transformers (modify the data) and Consumers (take data from the pipeline).
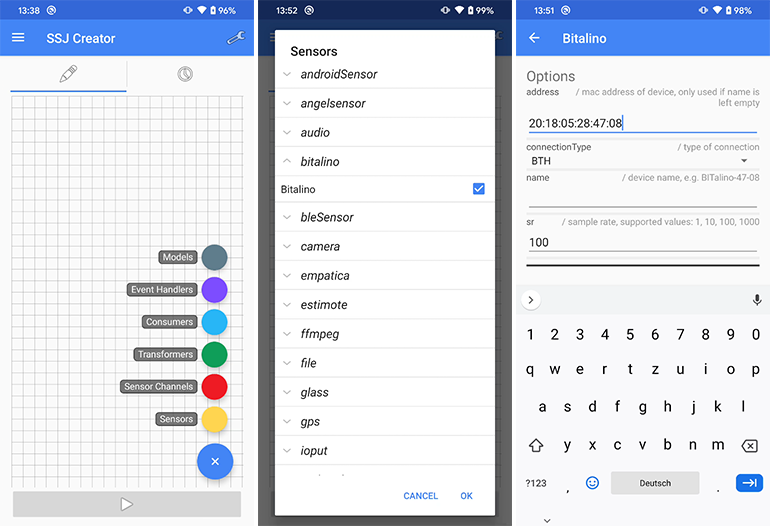
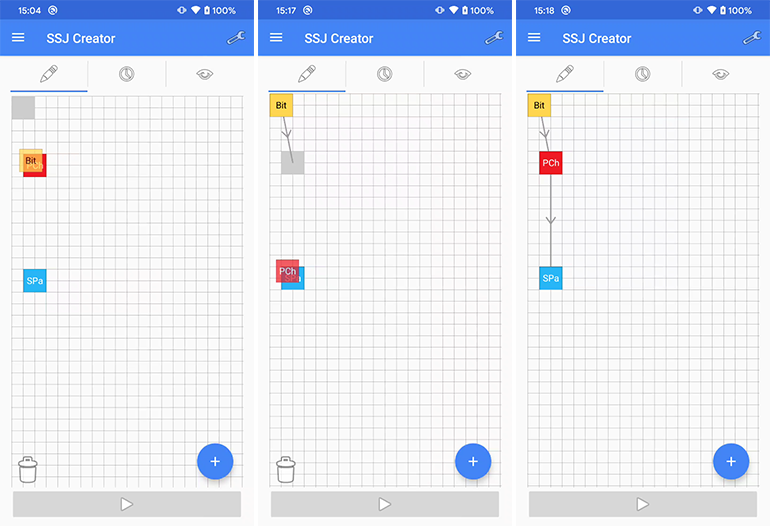
In order to add a new sensor component, tap on the (+) icon in the bottom right corner and select Sensors. From the list of supported sensors select bitalino. Then tap on the newly created Bit component to edit its options.
You can either enter the MAC address (which can be found on the side of the BITalino Core case, see Section 2.1) or the device name (which can be found in the list of available bluetooth devices, see Section 2.2). Additionally, you can change the sample rate at which the sensor provides data to the pipeline.
Since sensors can have multiple data channels (e.g., a camera sensor can have a video and an audio channel) we also need to add the corresponding channel to the pipeline.
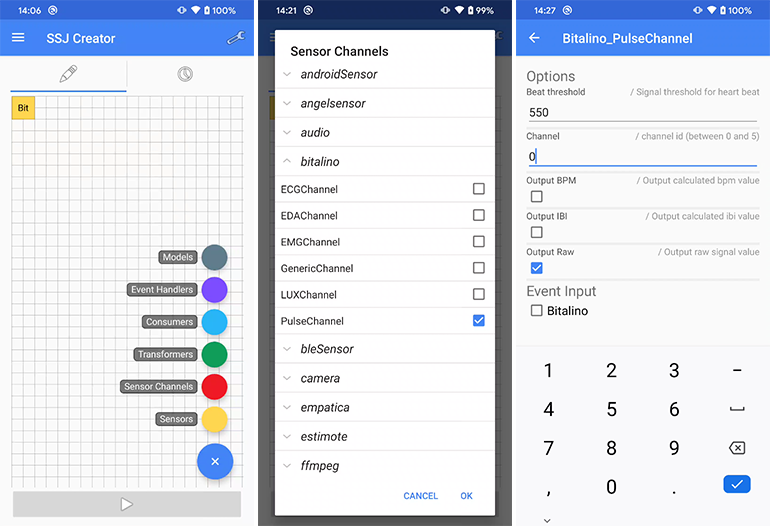
In order to add a new sensor channel component, tap on the (+) icon in the bottom right corner and select Sensor Channels. From the list of available sensor channels tap on bitalino and select the PulseChannel. Then tap on the newly created PCh component to edit its options.
Configure the channel id according to the analog port you used to connect the pulse sensor to the BITalino Core unit (A1 corresponds to channel id 0).
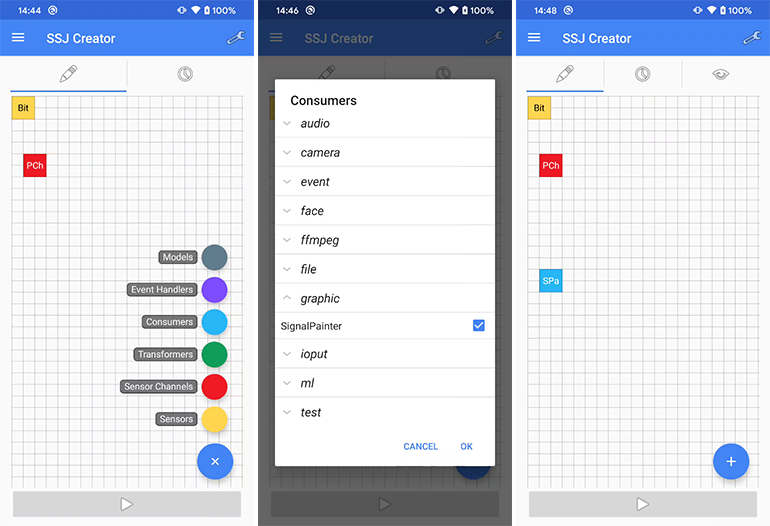
For demonstration purposes we will also add a component which displays the signal data. In order to do that, tap on the (+) icon in the bottom right corner and select Consumers. From the list of available consumers tap on graphic and select SignalPainter.
After all components have been added we need to connect them in order to define the data flow within the pipeline. For that, press and hold the Bit component until a trash icon appears in the bottom left corner. Then drag it over the PCh component and let go. The sensor is now connected to the channel. Repeat the same step with the PCh component (drag it over SPa) to connect the channel to the signal painter component.
(Hint: You can move a component by pressing and holding it until the trash icon appears and then dragging it to the target location; You can delete a component by dragging it onto the trash icon)
In order to start the pipeline, tap on the ⏵ button at the bottom of the screen. You can switch to the second tab at the top to access the debug console to ensure that no error has occurred. Note: It can take up to 30 seconds until a connection to the BITalino Core has been established. Until then the sensor channel will send zeroes to the connected components. After a successful connection you can switch to the third tab which displays the output of the signal painter component.

Success! You have created and started your first pipeline! (Hint: If you want to save the data instead of displaying it you can replace the signal painter component with a file writer component)
In order to stop the pipeline, tap on the ⏸ button at the bottom of the screen.
To use libssj in your own application, download the latest .aar file from the releases section, place it under app/libs/ and include the following line in your app's gradle file:
implementation files('libs/libssj-0.7.8.aar')After that you can start using the SSJ framework.
In order to create a new processing pipeline you need to get a reference to the hcm.ssj.core.Pipeline instance.
Pipeline pipeline = Pipeline.getInstance();In general, a pipeline consists of multiple components such as Sensors (provide data to the pipeline), Transformers (modify the data) and Consumers (take data from the pipeline).
Now create a new hcm.ssj.bitalino.Bitalino sensor object and set its options. You can either set the MAC address (which can be found on the side of the BITalino Core case, see Section 2.1) or the device name (which can be found in the list of available bluetooth devices, see Section 2.2). Additionally, you can change the sample rate at which the sensor provides data to the pipeline.
Bitalino sensor = new Bitalino();
sensor.options.address.set("20:18:05:28:47:08"); // or sensor.options.name.set("BITalino-XX-XX");
sensor.options.sr.set(10);Since sensors can have multiple data channels (e.g., a camera sensor can have a video and an audio channel) we also need to add the corresponding channel to the pipeline. For that, create a new hcm.ssj.bitalino.PulseChannel object and configure the channel id according to the analog port you used to connect the pulse sensor to the BITalino Core unit (A1 corresponds to channel id 0).
PulseChannel channel = new PulseChannel();
channel.options.channel.set(0);For debugging purposes we will also add a component which prints the signal data to the android debug log. For that, create a new hcm.ssj.test.Logger object.
Logger logger = new Logger();After all objects have been created we need to add them to the pipeline.
pipeline.addSensor(sensor, channel);
pipeline.addConsumer(logger, channel);Once you have created and added all objects to the pipeline your code should look similar to that:
// Imports
import hcm.ssj.bitalino.Bitalino;
import hcm.ssj.bitalino.PulseChannel;
import hcm.ssj.core.Pipeline;
import hcm.ssj.test.Logger;

// Get pipeline
Pipeline pipeline = Pipeline.getInstance();

// Create sensor
Bitalino sensor = new Bitalino();
sensor.options.address.set("20:18:05:28:47:08"); // or sensor.options.name.set("BITalino-XX-XX");
sensor.options.sr.set(10);

// Create channel
PulseChannel channel = new PulseChannel();
channel.options.channel.set(0);

// Create consumer
Logger logger = new Logger();

// Add components to pipeline
pipeline.addSensor(sensor, channel);
pipeline.addConsumer(logger, channel);
You can now start the pipeline with the following code:
pipeline.start();Note: It can take up to 30 seconds until a connection to the BITalino Core has been established. Until then the sensor channel will send zeroes to the connected components. After a successful connection you should see similar log entries to the ones below:
hcm.ssj.test I/SSJ: [bitalino.Bitalino] connected to bitalino 20:18:05:28:47:08
hcm.ssj.test I/SSJ: [test.Logger] 487.0
hcm.ssj.test I/SSJ: [test.Logger] 486.0
hcm.ssj.test I/SSJ: [test.Logger] 579.0
hcm.ssj.test I/SSJ: [test.Logger] 528.0
hcm.ssj.test I/SSJ: [test.Logger] 515.0
hcm.ssj.test I/SSJ: [test.Logger] 466.0
hcm.ssj.test I/SSJ: [test.Logger] 418.0
hcm.ssj.test I/SSJ: [test.Logger] 469.0
hcm.ssj.test I/SSJ: [test.Logger] 517.0
Success! You have created and started your first pipeline!
In order to stop the pipeline execute the following code:
pipeline.stop();
pipeline.clear();