New Display Modification
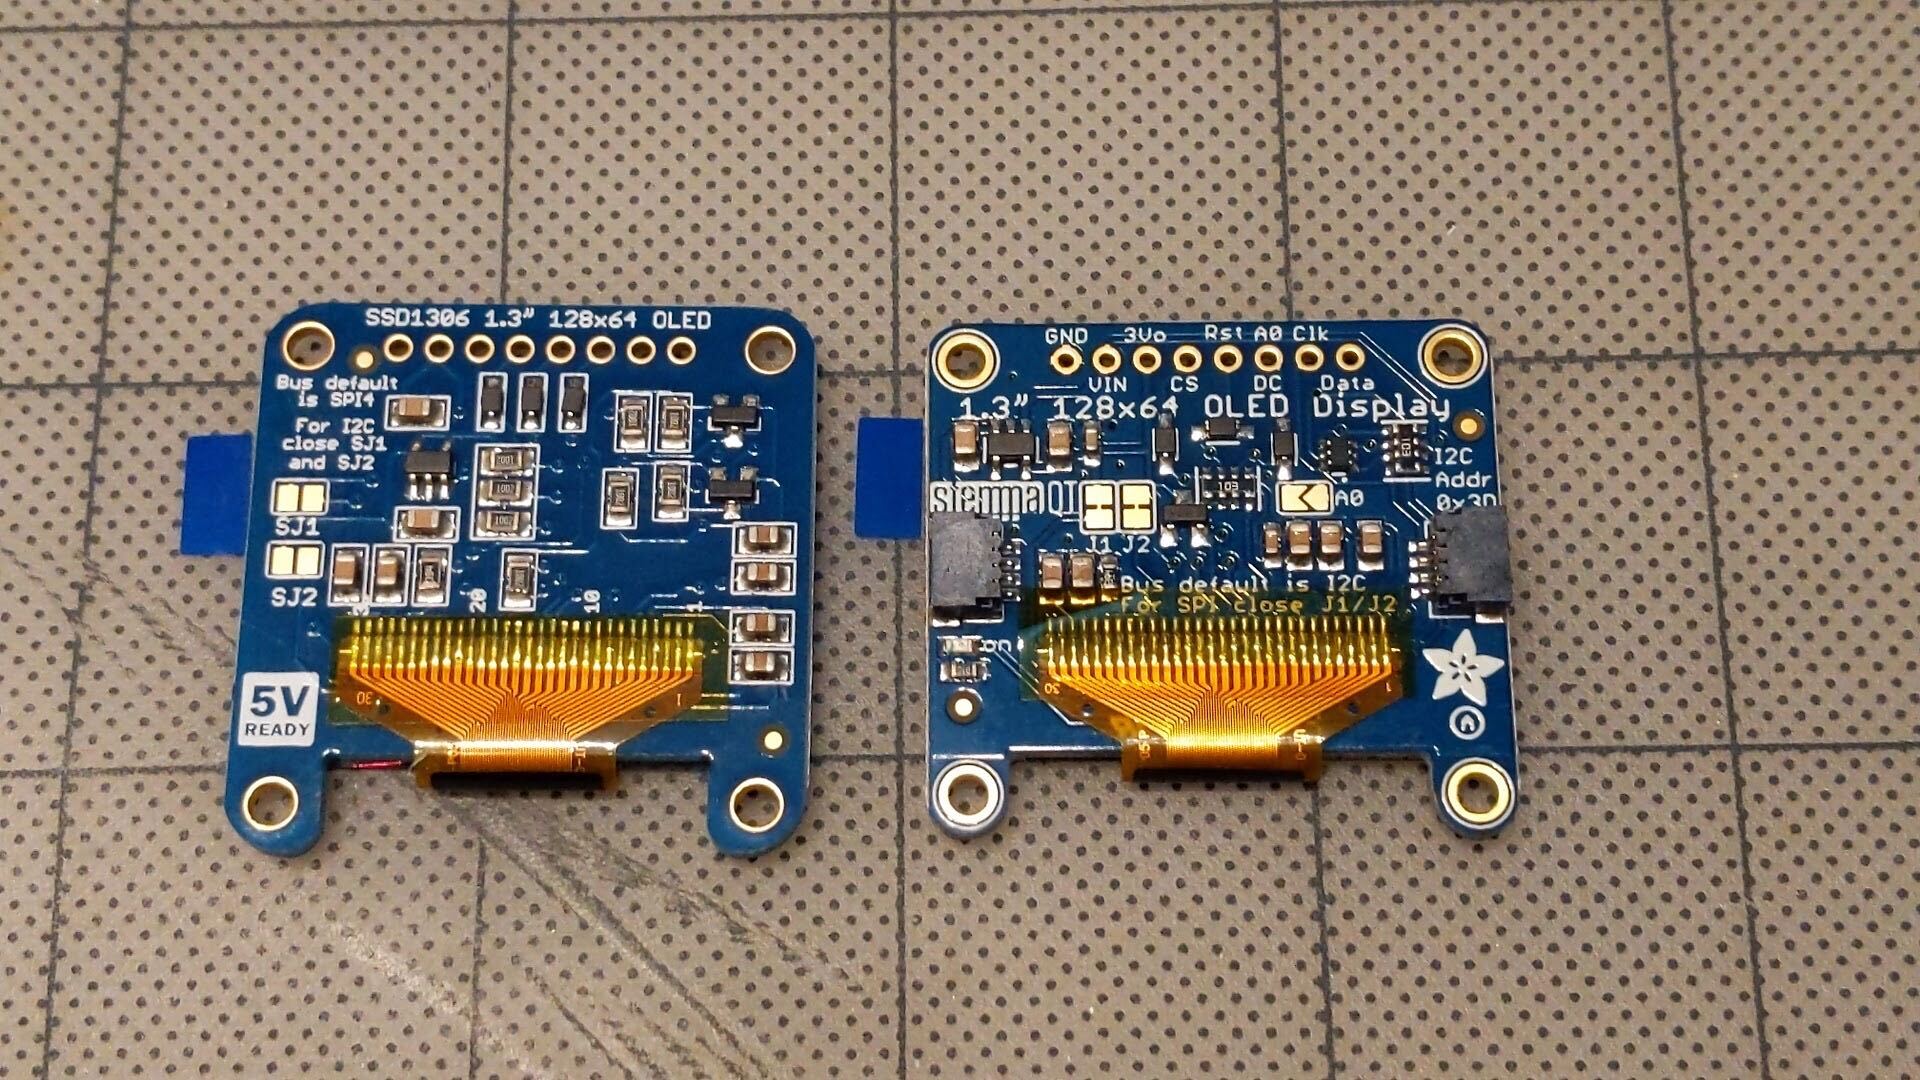
The newer display with the Ada Fruit logo on the right requires some modification before installation.
First the two jumpers shown here must be cut.
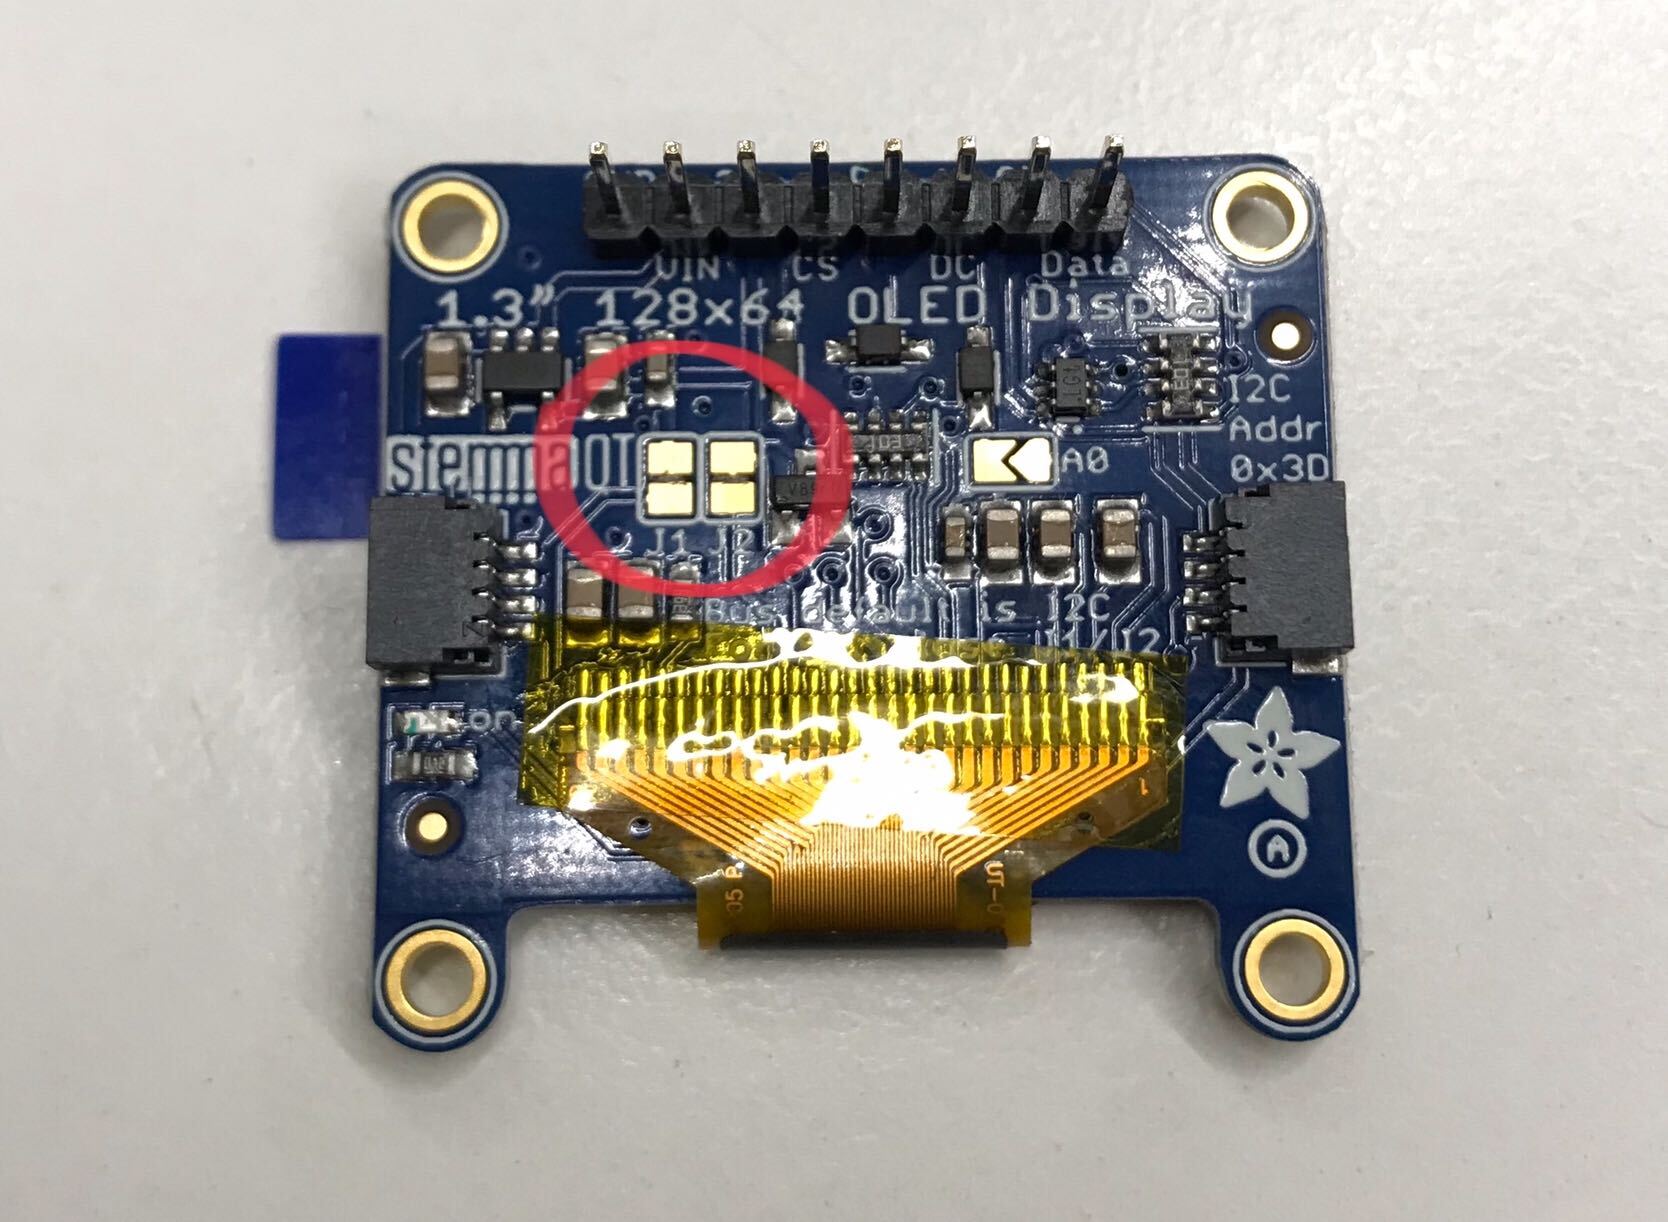
They'll look like this to start.
Use a razor or other small sharp tool to break the connection between the two pads, J1 & J2.
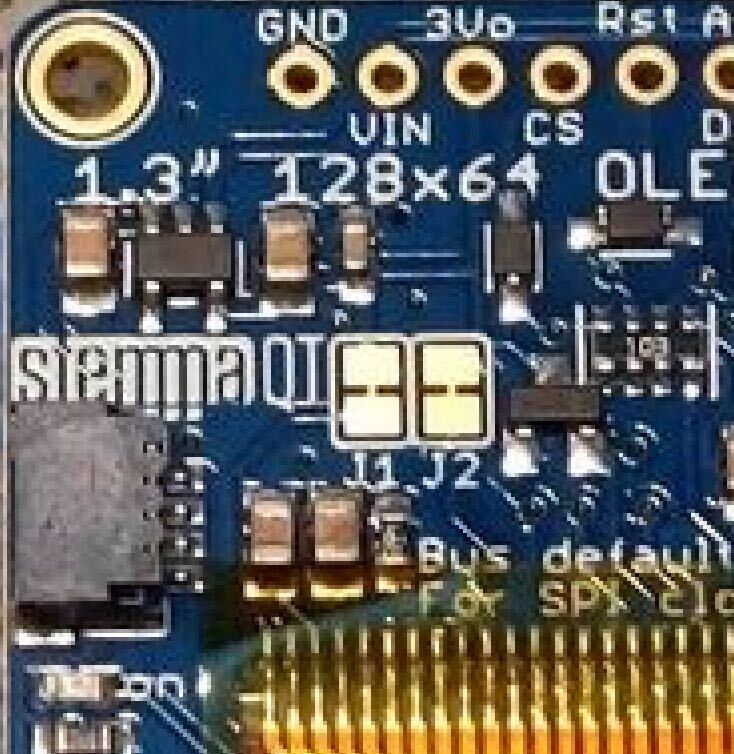
After being cut they should looks like this:
Finally, the mounting holes aren't in the right position for the kit's standoffs. You can either leave them off and the display should be supported well enough by the connection pins. Or you can file away the holes to until the standoffs fit.