Choosing Parameters for Beginners
You use parameters to control what the neural network sees and how it sees input images. You also use parameters to control what the goals (targets) are for the network, and which goals should have priority over others.
The network can be thought of as always containing at least 3 images, the style image, the content image, and the output image. Every iteration, calculations are made with respect to content and style targets to see how to change the output.
By default, almost any image can be used for either the content or style image inputs. Though content and style images with similar shapes, features, color, content/detail ratios (ex: a painted portrait and an image of someone where both figures are roughly the same size, with the same size background), have been found to work particularly well.
It is important to ensure that your style image(s) are high quality. The quality content images will influence the output image to a varying degree, but the style image(s) used will determine the quality of your output image. Things like motion blur in the content image will not result in an output image having motion blur.
-
You can see an example of how content image quality affects output images here.
-
You can see an example of how style image quality affects output images here.
You can use thousands of style images if you choose and that will not increase memory usage. However, it takes time to load style images into the network, and thus using more style images will take longer to load.
Total variance denoising should be set to 0 with -tv_weight 0 if you wish to get as sharp a result as possible. When using the NIN model or another model that produces noticeable artifacts, you can use a really low TV weight to help remove them.
Total variance denoising produces a smoothing/blurring effect on output images.
Choosing content and style weights are an important balancing act which greatly influences your output image.
A higher style weight like: -content_weight 10 -style_weight 4000 this will make the output look a lot more like the style image(s) than these weights: -content_weight 50 -style_weight 100.
In addition to the ratio of content to style weights, the values themselves are also important:
- Ex:
-content_weight 5 -style_weight 10will produce a different output than-content_weight 50 -style_weight 100.
You can also disable the content loss module with -content_weight 0. As long as you are also using -init image, the chosen style weight will still be extremely important as the content image still exists in the network.
In general higher style weights seem to produce better results, as long as the content weight isn't too high as well.
Both the VGG and NIN model architectures are hierarchical. That means that each layer is connected to the layer above it and the layer below.
Lower layers focus on details like texture and color, higher layers focus on objects, and even higher layers focus on large objects or even the entire scene in the image.
For the purpose of style transfer, the chosen style layers will affect the output image far more than the chosen content layers.
The original research paper used average pooling, but users have found that max pooling gives better results. By default the -pooling parameter is set to max, so you don't have to specify max pooling.
By default the seed will be random every time you run the code. By specifying a seed value, you can recreate the exact same output when running the same parameters again. You can also specify/change the seed value to slightly alter the output image.
By default iteration loss values are printed every 50 iterations. But you can change that with the -print_iter parameter. Loss values should decrease as more iterations are performed, if everything is working correctly.
Generally, you want to avoid making your artwork look like a cheap filter, and more like a new and wonderful work of art.
There is also the issue of whether your artwork looks unique enough from your input images. You an use https://www.tineye.com/ and Google Reverse Image Search to see if they can figure out what my content image is, and then judge just how "unique" your artwork is based on that. If you are using personal images that aren't easily found on the internet, then both TinEye and Google Reverse Image search won't work at all for this test.
The output image format is specified by the extension used in the output image's name. You can find a list of all possible output image formats here.
The -cudnn_autotune uses a little extra memory to try and speed things up. You can omit this parameter if you wish to use a bit less GPU memory.
Every layer in convolution neural network has channels (also called filters or neurons). Higher layers have more channels while lower layers have less channels. By default, every layer is given the content or style weight values. The -normalize_weights parameter divides the specified content and style weight values by the number of channels in each layer, results in different weights for each layer. The end results is that lower layers will end up with a higher weight value than higher layers.
Normalizing the layer weights results in style image features becoming more like those found in the original style image. This is a similar effect to running a multiscale generation script multiple times on the same output image.
If you are not familiar with the concept of multiscale generation and why it's used, please read the Multiscale Generation for Beginners guide before continuing.
For this guide we are going to use the same parameters for each multiscale generation step, but others have found great success with changing some parameters each step.
For the basic multiscale generation example used below, we will add a seed value to make our results repeatable. We will also set -tv_weight to 0, to make sure our results are as sharp looking as possible.
python3 neural_style.py -seed 876 -tv_weight 0 -output_image out1.png -image_size 512

python3 neural_style.py -seed 876 -tv_weight 0 -output_image out2.png -init image -init_image out1.png -image_size 720

python3 neural_style.py -seed 876 -tv_weight 0 -output_image out3.png -init image -init_image out2.png -image_size 1024

python3 neural_style.py -seed 876 -tv_weight 0 -output_image out4.png -init image -init_image out3.png -image_size 1536
The \ character makes the subsequent lines be treated like part of the same line, to make things more easily readable for humans. The two example below are exactly the same when run:
python3 neural_style.py -output_image out1.png -image_size 512
python3 neural_style.py \
-output_image out1.png \
-image_size 512
You should also be aware that different software library versions, OS versions, CUDA/cuDNN versions, etc... will change the results that a specific seed value will give you. This means that your results may not be the exact same as the example output images shown below.
Below you will be walked through creating a multiscale generation script:
We'll start with these input images:

# Step 1
python3 neural_style.py -seed 876 -tv_weight 0 -output_image out1.png -init image \
-image_size 512 -num_iterations 1500 -content_weight 0.5 -style_weight 4000 \
-save_iter 0 -backend cudnn -cudnn_autotune \
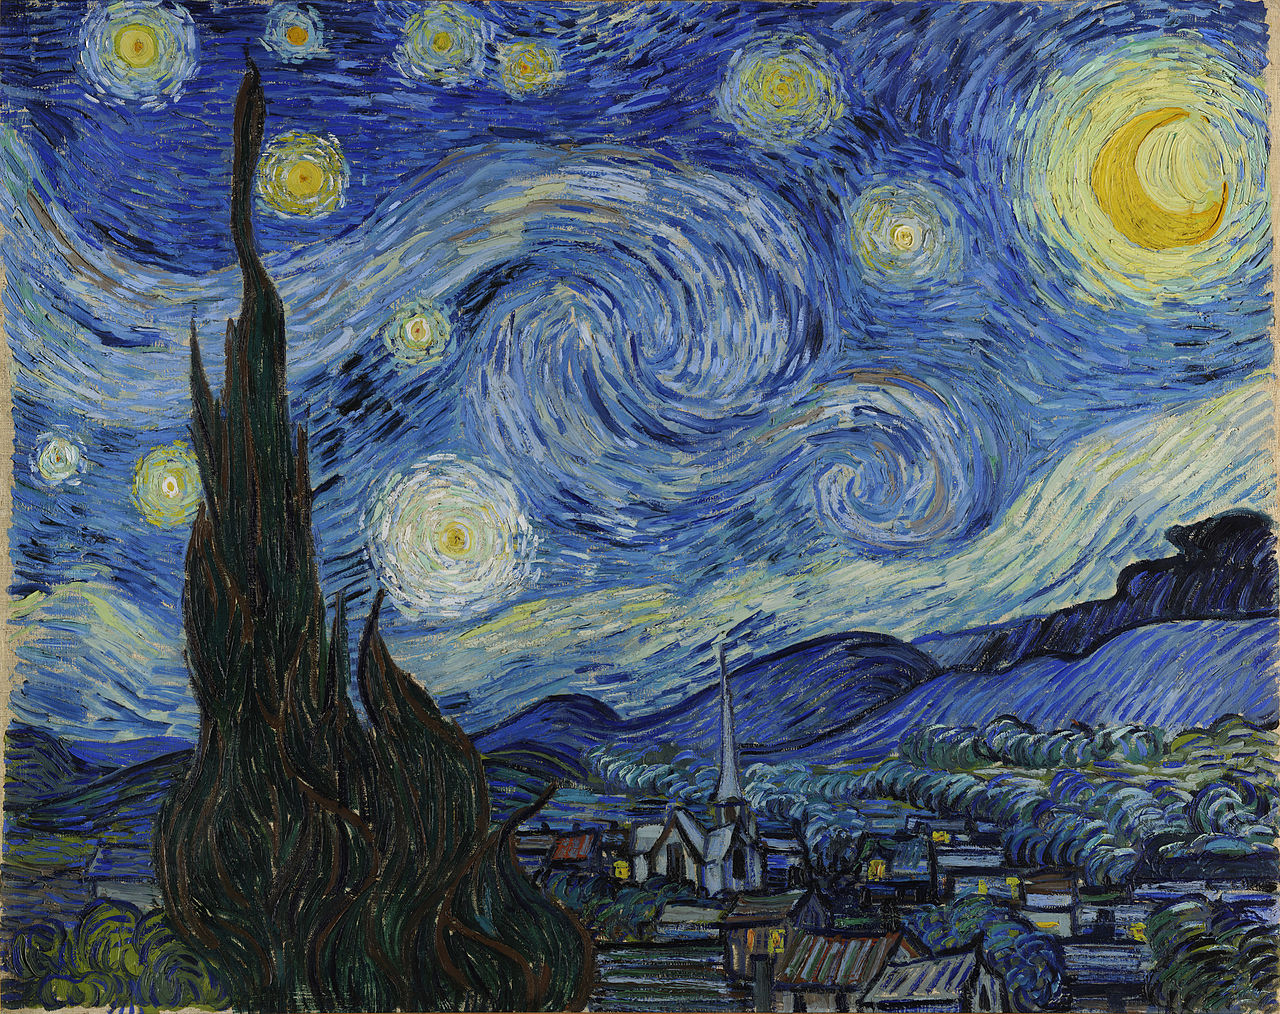
-content_image examples/inputs/brad_pitt.jpg -style_image examples/inputs/starry_night_google.jpg
# Step 2
python3 neural_style.py -seed 876 -tv_weight 0 -output_image out2.png -init image \
-init_image out1.png -image_size 720 -num_iterations 1000 -save_iter 0 \
-content_weight 0.5 -style_weight 4000 -backend cudnn -cudnn_autotune \
-content_image examples/inputs/brad_pitt.jpg -style_image examples/inputs/starry_night_google.jpg
# Step 3
python3 neural_style.py -seed 876 -tv_weight 0 -output_image out3.png -init image \
-init_image out2.png -image_size 1024 -num_iterations 500 -save_iter 0 \
-content_weight 0.5 -style_weight 4000 -backend cudnn -cudnn_autotune \
-content_image examples/inputs/brad_pitt.jpg -style_image examples/inputs/starry_night_google.jpg
# Step 4
python3 neural_style.py -seed 876 -tv_weight 0 -output_image out4.png -init image \
-init_image out3.png -image_size 1536 -num_iterations 200 -save_iter 0 \
-content_weight 0.5 -style_weight 4000 -backend cudnn -cudnn_autotune \
-content_image examples/inputs/brad_pitt.jpg -style_image examples/inputs/starry_night_google.jpg
# Step 5
python3 neural_style.py -seed 876 -tv_weight 0 -output_image out5.png -init image \
-init_image out4.png -image_size 1664 -num_iterations 200 -save_iter 0 \
-content_weight 0.5 -style_weight 4000 -backend cudnn -cudnn_autotune \
-content_image examples/inputs/brad_pitt.jpg -style_image examples/inputs/starry_night_google.jpg
# Step 6
python3 neural_style.py -seed 876 -tv_weight 0 -output_image out6.png -init image \
-init_image out5.png -image_size 1920 -num_iterations 200 -save_iter 0 \
-content_weight 0.5 -style_weight 4000 -backend cudnn -cudnn_autotune -optimizer adam \
-content_image examples/inputs/brad_pitt.jpg -style_image examples/inputs/starry_night_google.jpg
-
To start, the
-num_iterationsparameter has been set to1500iterations for step 1. Step 2 has been set to1000iterations, step 3 has been set to500iterations, and steps 4-6 have been set to200iterations. Most of the major stylization occurs on the lower steps, which is why they have more iterations. Higher steps only have to increase the output image resolution and perfect the work of the lower steps. -
The
-save_iterparameter has been set to0for the purpose of making the outputs produced by this example more clear. -
The
-content_weighthas been set to0.5and the-style_weightparameter has been set to4000. Being such a large ratio,-init imagemust be used on step 1 for the content image to have a noticeable effect on the output image. -
The
-optimizerparameter is set toadamon step 6 to avoid an out of memory error. -
The
-backendparameter is set tocudnnin order to reduce memory usage and speed things up. The-cudnn_autotuneparameter is used to farther speed up the style transfer process. -
The value that the
-image_sizeparameter increases by each step should not be too large or else the network will not be able to properly increase the output image's quality as it's size goes up. Too few iterations on a step will also prevent the network from increasing the output image's quality.

Now, let's try the above example with histogram matching!
Here's what the content image looks like below, after having it's histogram changed to the style image's histogram:

And here's the full histogram matching example code:
python3 linear-color-transfer.py --target_image examples/inputs/brad_pitt.jpg \
--source_image examples/inputs/starry_night_google.jpg --output_image content_hist.png

# Step 1
python3 neural_style.py -seed 876 -tv_weight 0 -output_image out1.png -init image \
-image_size 512 -num_iterations 1500 -content_weight 0.5 -style_weight 4000 \
-save_iter 0 -backend cudnn -cudnn_autotune \
-content_image content_hist.png -style_image examples/inputs/starry_night_google.jpg

python3 linear-color-transfer.py -t out1.png -s examples/inputs/starry_night_google.jpg -o out1_hist.png

# Step 2
python3 neural_style.py -seed 876 -tv_weight 0 -output_image out2.png -init image \
-init_image out1_hist.png -image_size 720 -num_iterations 1000 -save_iter 0 \
-content_weight 0.5 -style_weight 4000 -backend cudnn -cudnn_autotune \
-content_image content_hist.png -style_image examples/inputs/starry_night_google.jpg

python3 linear-color-transfer.py -t out2.png -s examples/inputs/starry_night_google.jpg -o out2_hist.png

# Step 3
python3 neural_style.py -seed 876 -tv_weight 0 -output_image out3.png -init image \
-init_image out2_hist.png -image_size 1024 -num_iterations 500 -save_iter 0 \
-content_weight 0.5 -style_weight 4000 -backend cudnn -cudnn_autotune \
-content_image content_hist.png -style_image examples/inputs/starry_night_google.jpg

python3 linear-color-transfer.py -t out3.png -s examples/inputs/starry_night_google.jpg -o out3_hist.png

# Step 4
python3 neural_style.py -seed 876 -tv_weight 0 -output_image out4.png -init image \
-init_image out3_hist.png -image_size 1536 -num_iterations 200 -save_iter 0 \
-content_weight 0.5 -style_weight 4000 -backend cudnn -cudnn_autotune \
-content_image examples/inputs/brad_pitt.jpg -style_image examples/inputs/starry_night_google.jpg

python3 linear-color-transfer.py -t out4.png -s examples/inputs/starry_night_google.jpg -o out4_hist.png

# Step 5
python3 neural_style.py -seed 876 -tv_weight 0 -output_image out5.png -init image \
-init_image out4_hist.png -image_size 1664 -num_iterations 200 -save_iter 0 \
-content_weight 0.5 -style_weight 4000 -backend cudnn -cudnn_autotune \
-content_image examples/inputs/brad_pitt.jpg -style_image examples/inputs/starry_night_google.jpg

python3 linear-color-transfer.py -t out5.png -s examples/inputs/starry_night_google.jpg -o out5_hist.png

# Step 6
python3 neural_style.py -seed 876 -tv_weight 0 -output_image out6.png -init image \
-init_image out5_hist.png -image_size 1920 -num_iterations 200 -save_iter 0 \
-content_weight 0.5 -style_weight 4000 -backend cudnn -cudnn_autotune -optimizer adam \
-content_image examples/inputs/brad_pitt.jpg -style_image examples/inputs/starry_night_google.jpg

Using different models (via the -model_file parameter) can completely change what your output image looks like. In essence each model has it's own style that influences the output image.
-
Some models may also perform better with certain kinds of styles and content images. Other models are best used to help push the maximum image size higher, like NIN or the Channel Pruning model.
-
You can a list of compatible models available for download here.
Here's the above histogram matching example run with each of the available models (parametesr are the exact same unless specified):


- The NIN model used layers
-content_layers relu0,relu3,relu7,relu12 -style_layers relu0,relu3,relu7,relu12, and a-style_weightof40000.

- The Stylized ImageNet output used a
-style_weightof360000.


Sometimes you have to change your content and style weights if you use a different to achieve a similar level of stylization:

-
Both models are the
nin_imagenet.pthmodel. -
On the left:
-style_weight 40000, right:-style_weight 4000.
You can find other examples of parameters used by others in these places: