-
Notifications
You must be signed in to change notification settings - Fork 14
How to run a NonMouse executable file in each OS
Download the binary that matches your OS from the release. Then unzip it and follow the steps below.

Run NonMouse.exe
† On mac, I would recommend running it as python, as it will give better performance. 30fps camera on python will be 12fps on mac in the executable file.
First, run brew install tcl-tk in the terminal.

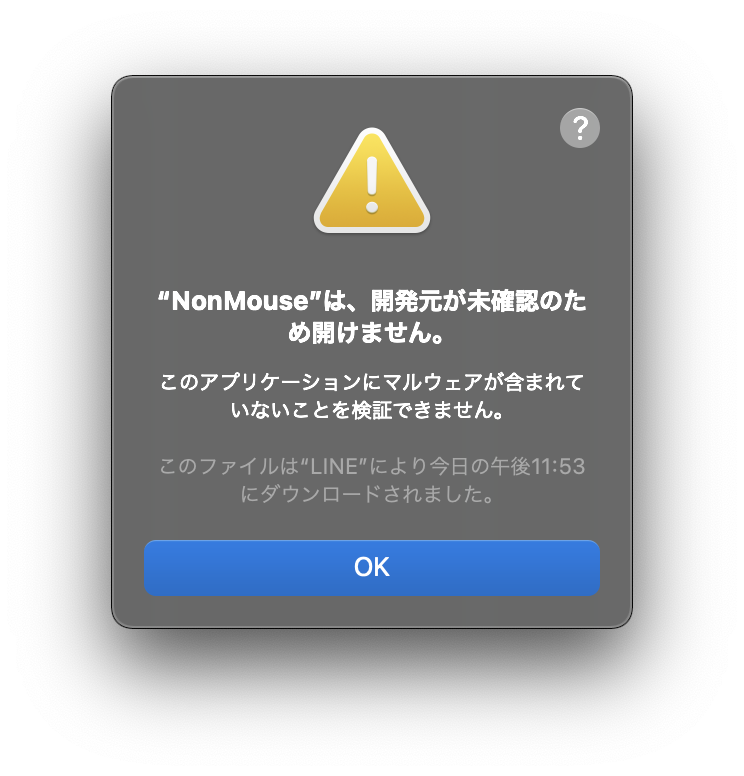
Next, run NonMouse in the folder, then the following screen will appear, click OK.
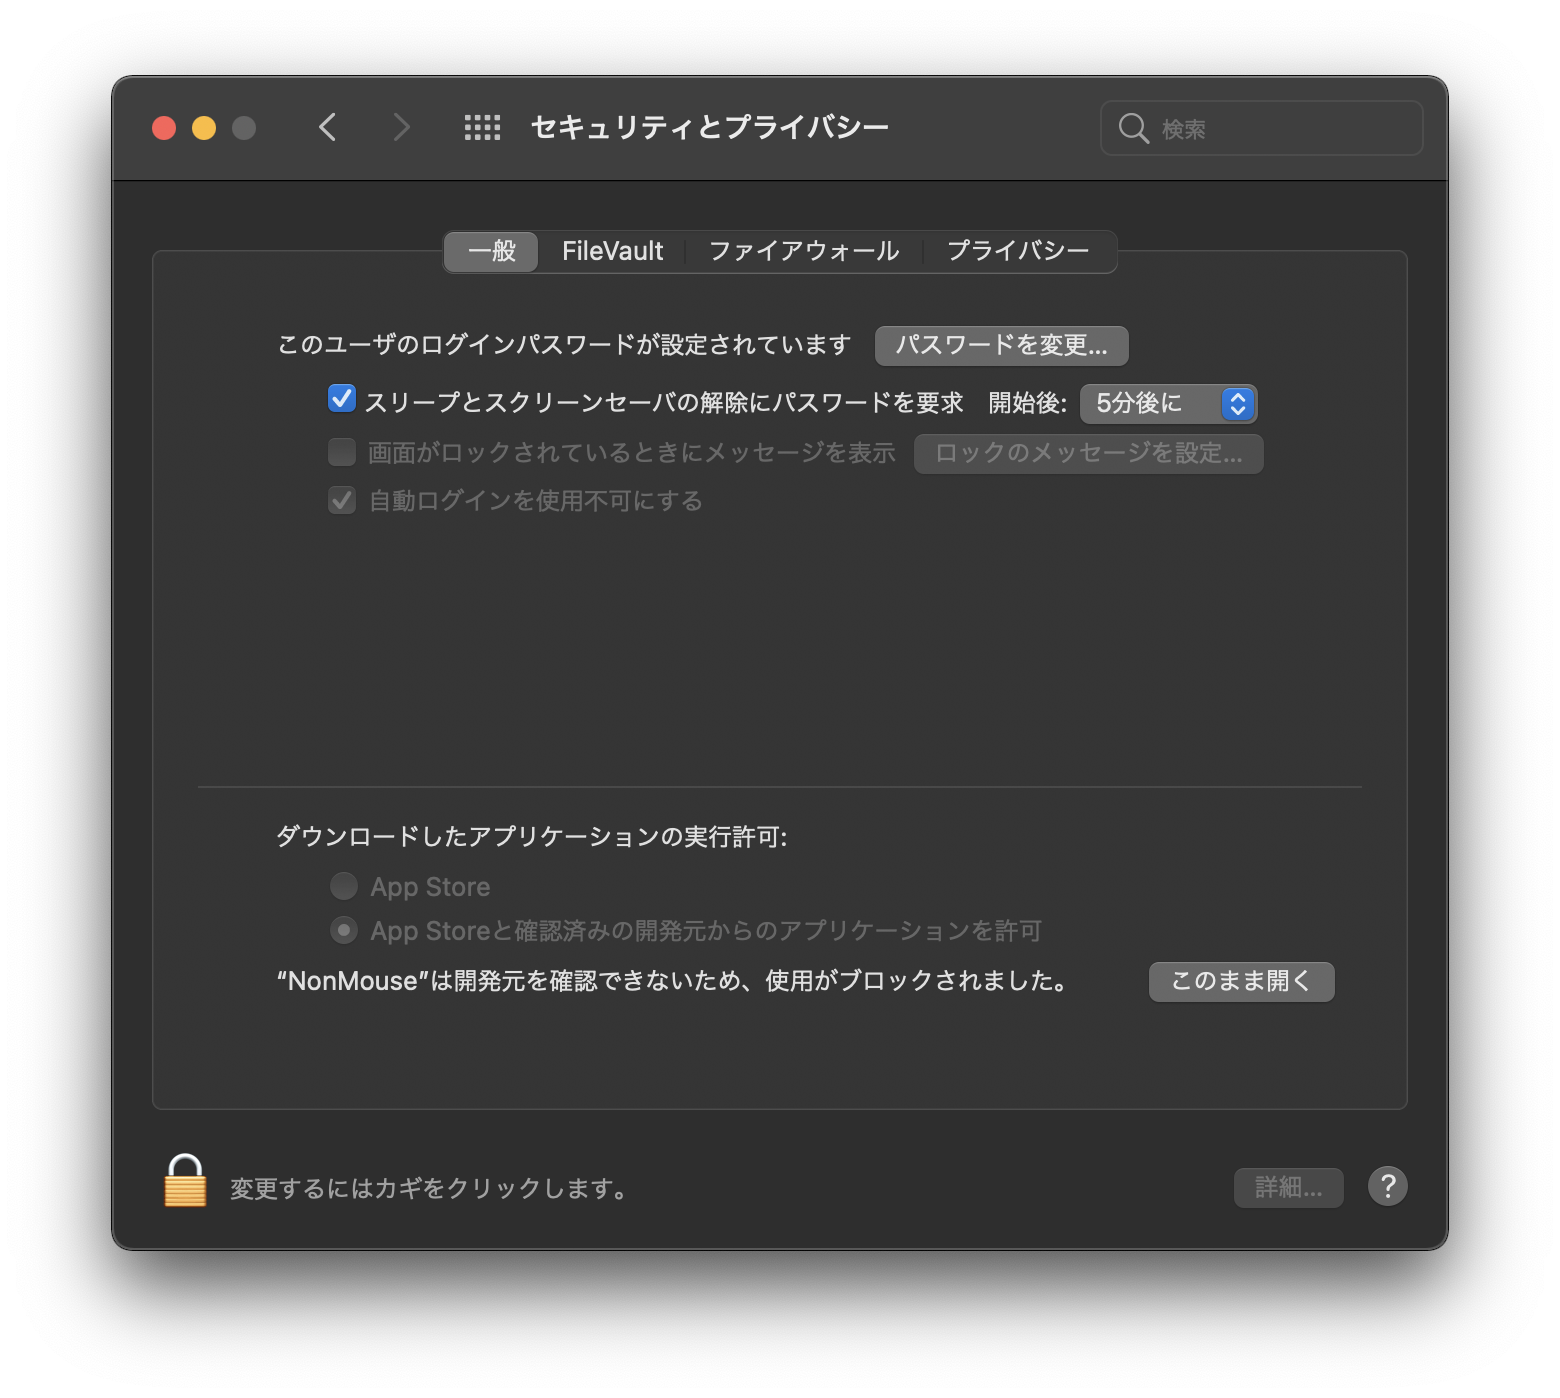
Next, go to System Preferences, go to "Security and Privacy," open the "General" section, and click "Open As..." at the bottom.
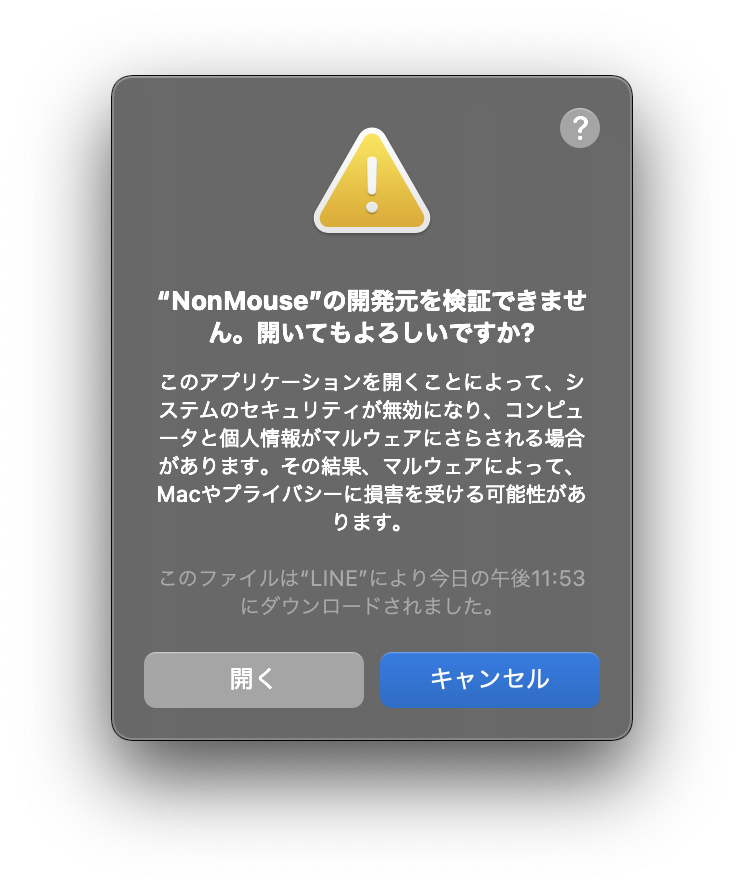
When the following screen appears, click "Open".
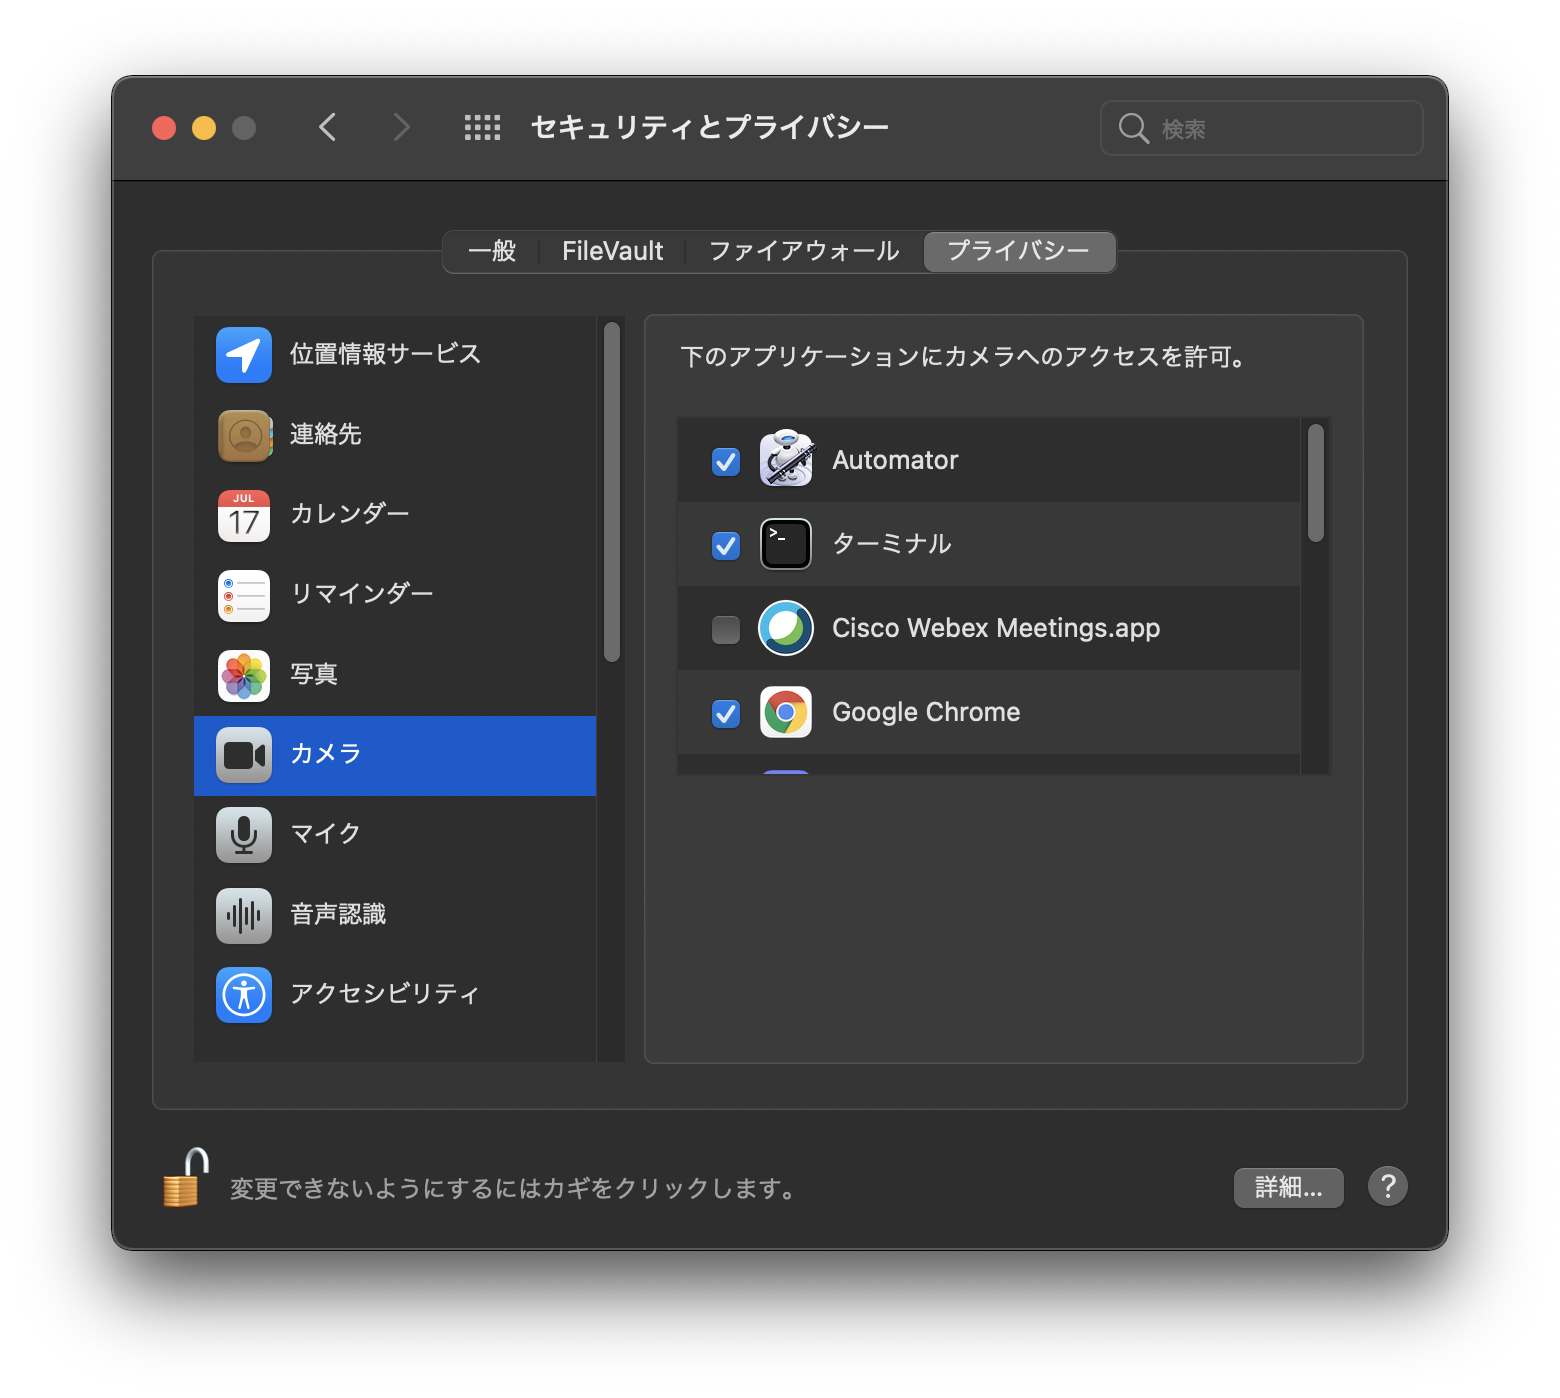
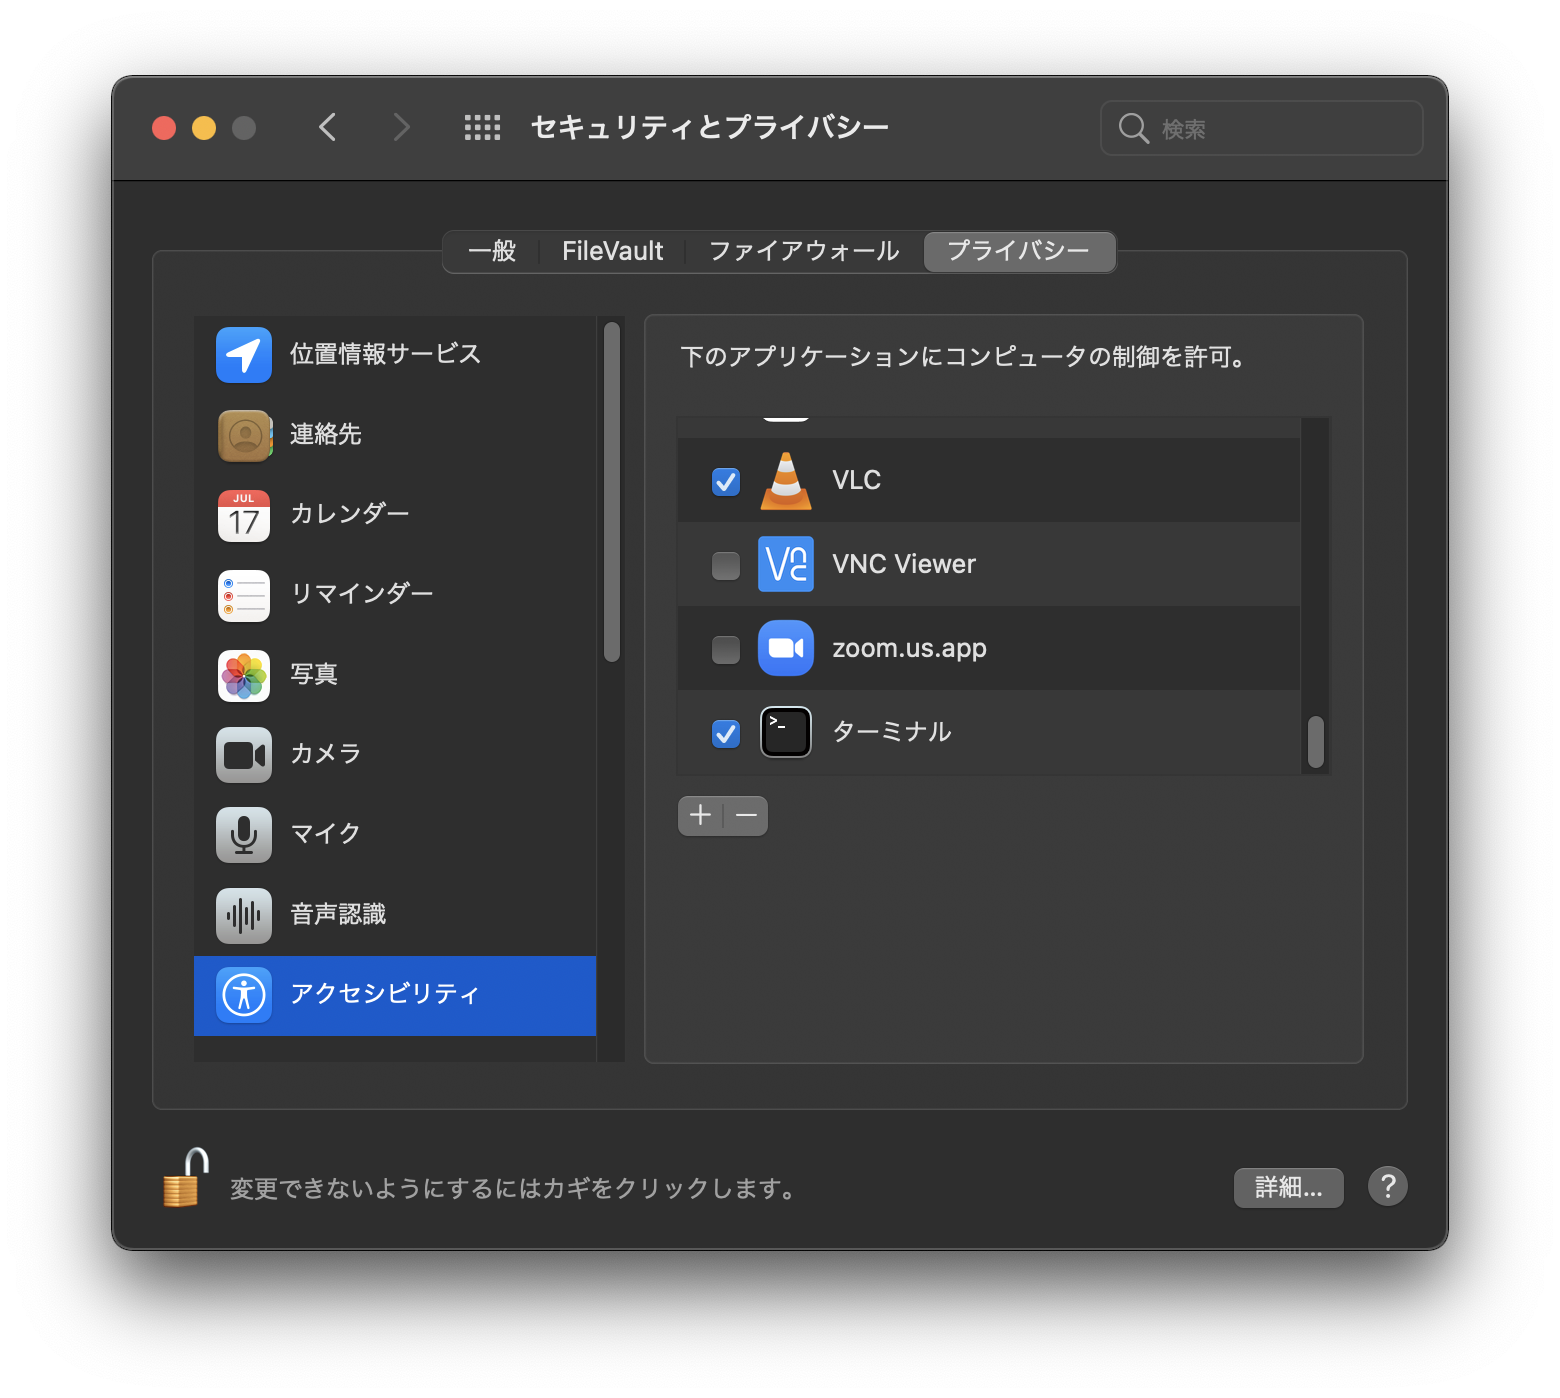
This still doesn't allow the app to access the camera and mouse cursor, so go to System Preferences and under "Privacy" in "Security and Privacy", in the "Accessibility" and "Camera" sections, add a terminal as shown below.
Lastly, run sudo /path/to/NonMouse in the terminal. Please change /path/to/NonMoue according to your personal environment. If you download it normally, you will get /Users/XXX/Downloads/mac-x86_64-0.3.0/NonMouse (XXX is your user name).
Next time, just sudo /path/to/NonMouse to run it.
Run it as a python file.
リリースからOSに合わせたバイナリをダウンロードしてください。そして、解凍して、以下の手順に従います。

を実行。
† macにおいてはpythonとして実行したほうが性能が出るので、そちらをおすすめします。pythonだと30fpsでるカメラでも、実行可能ファイルでは、macだと12fps程度になってしまいます。
まず、ターミナルでbrew install tcl-tkを実行。

次に、リリースフォルダー内のNonMouseを実行。すると、以下の画面が出るので、OKをクリック

次に、システム環境設定から「セキリュティとプライバシー」の「一般」の項目を開いて、一番下の「このまま開く」をクリック

以下の画面が出るので、「開く」をクリック

これでも、アプリがカメラとマウスカーソルにアクセスできないので、システム環境設定から「セキリュティとプライバシー」の「プライバシー」で、「アクセシビリティ」と「カメラ」の項目において、以下のようにターミナルを追加。


最後に、ターミナルで sudo /path/to/NonMouse を実行します。なお、/path/to/NonMoueは各自の環境に合わせて変更してください。普通にダウンロードすれば、/Users/XXX/Downloads/mac-x86_64-0.3.0/NonMouse(XXXは自分のユーザー名です)
次からは、sudo /path/to/NonMouseだけで実行できます。
pythonファイルとして実行してください。