| title | description | position | category |
|---|---|---|---|
快速上手 |
Serverless Devs快速上手教程 |
2 |
概述 |
本快速上手案例以 阿里云函数计算 为例(当然,Serverless Devs 还支持 AWS Lambda,百度智能云函数计算,华为云函数工作流,腾讯云云函数等多个云厂商的 FaaS 平台)的快速上手 Serverless Devs
通过 npm 包管理安装:适用于已经预装了 npm 的 Windows、Mac、Linux 平台。在 Windows、Mac、Linux 平台执行以下命令安装 Serverless Devs Tool工具。
$ npm install @serverless-devs/s -g或者 通过 yarn 进行安装
$ yarn global add @serverless-devs/s说明:
- 如果在 Linux 或 MacOS 下执行该命令报错且报错信息为
未找到命令,请执行命令ln -s serverless-devs安装位置 /usr/bin,serverless-devs安装位置可以通过find / -name s查找。- 如果在 Linxu 下执行该命令报错且报错信息为
Error: EACCES: permission denied,请执行命令npm install @serverless-devs/s -g。- 如果安装过程较慢,可以考虑使用淘宝 npm 源,安装命令为
npm --registry=https://registry.npm.taobao.org install @serverless-devs/s -g。
打开 releases 页面,在最新的发布版本(Release)中选择对应平台的压缩包,点击直接下载。
压缩包下载到本地后,解压即可直接使用。
下面是针对不同平台的详细操作步骤:
- 找到一个最新的发布版本(Release),下载
s-*-win.exe.zip文件(其中 * 表示版本号,如 v3.0.0)。 - 解压文件
s-*-win.exe.zip得到s-*.win.exe文件,重名为s.exe。 - 将
s.exe文件拷贝到系统 PATH 目录即可,比如:C:\WINDOWS\System32。 - 打开命令终端,执行
s.exe --version,查看返回版本号以验证是否安装成功。
- 找到一个最新的发布版本(Release),下载
s-*-linux.zip文件(其中 * 表示版本号,如 v3.0.0)。 - 解压 zip 文件
$ unzip s-linux.zip
Archive:  s-v3.0.0-linux.zip
  inflating: s-v3.0.0-linux
- 移到 PATH 目录
$ mv s-*-linux /usr/local/bin/s
- 验证版本
$ s -v
@serverless-devs/s: 3.0.0
- 找到一个最新的发布版本(Release),下载
s-*-macos.zip文件(其中 * 表示版本号,如 v3.0.0)。 - 解压 zip 文件
$ unzip s-macos.zip
Archive:  s-v3.0.0-macos.zip
  inflating: s-v3.0.0-macos
- 移到 PATH 目录
$ mv s-*-macos /usr/local/bin/s
- 验证版本
$ s -v
@serverless-devs/s: 3.0.0
针对 Mac / Linux 用户
$ curl -o- -L http://cli.so/install.sh | bashServerless Devs 开发者工具会不定期的进行更新升级。开发者在使用 Serverless Devs 开发者工具时,可以根据系统提醒进行进行最新版本的感知。
当客户端感知到系统升级之后,开发者可以通过命令npm i -g @serverless-devs/s进行更新操作,也可以通过 Release 信息查看升级的具体内容,以决定是否进行本次升级。
例如:我当前的 Serverless Devs 的版本是
2.0.89,当系统升级之后,我再使用Serverless Devs开发者工具,工具将会给出相对应的提醒:╭───────────────────────────────────────────────╮ │ │ │ Update available 2.0.89 → 2.0.90 │ │ Run npm i -g @serverless-devs/s to update │ │ │ ╰───────────────────────────────────────────────╯此时,只需要按照提醒进行工具更新升级即可。
由于本快速上手文档,将会以 阿里云函数计算 为例,所以此处的密钥配置也是以阿里云密钥配置为例:
-
打开 获取密钥页面 获取密钥信息 :
-
执行
s config add,并选择Alibaba Cloud (alibaba):$ s config add ? Please select a provider: Alibaba Cloud (alibaba) 🧭 Refer to the document for alibaba key: http://config.devsapp.net/account/alibaba ? AccessKeyID:
-
此时,可以按照引导,进行密钥的配置:
? Please select a template: Alibaba Cloud (alibaba)
🧭 Refer to the document for alibaba key:  http://config.devsapp.net/account/alibaba
? AccessKeyID 此处填写AccessKeyID
? AccessKeySecret 此处填写AccessKeySecret
? Please create alias for key pair. If not, please enter to skip alibaba-access

    Alias: alibaba-access
    AccountID: 自动获取AccountID
    AccessKeyID: 此处填写AccessKeyID
    AccessKeySecret: 此处填写AccessKeySecret

✔ Configuration successful
-
为了验证密钥是否正确配置,可以通过
s config get -a alibaba-access进行指定密钥的查看:$ s config get -a alibaba-access alibaba-access: AccountID: 此处填*******tID AccessKeyID: 此处填*********yID AccessKeySecret: 此处填*************ret
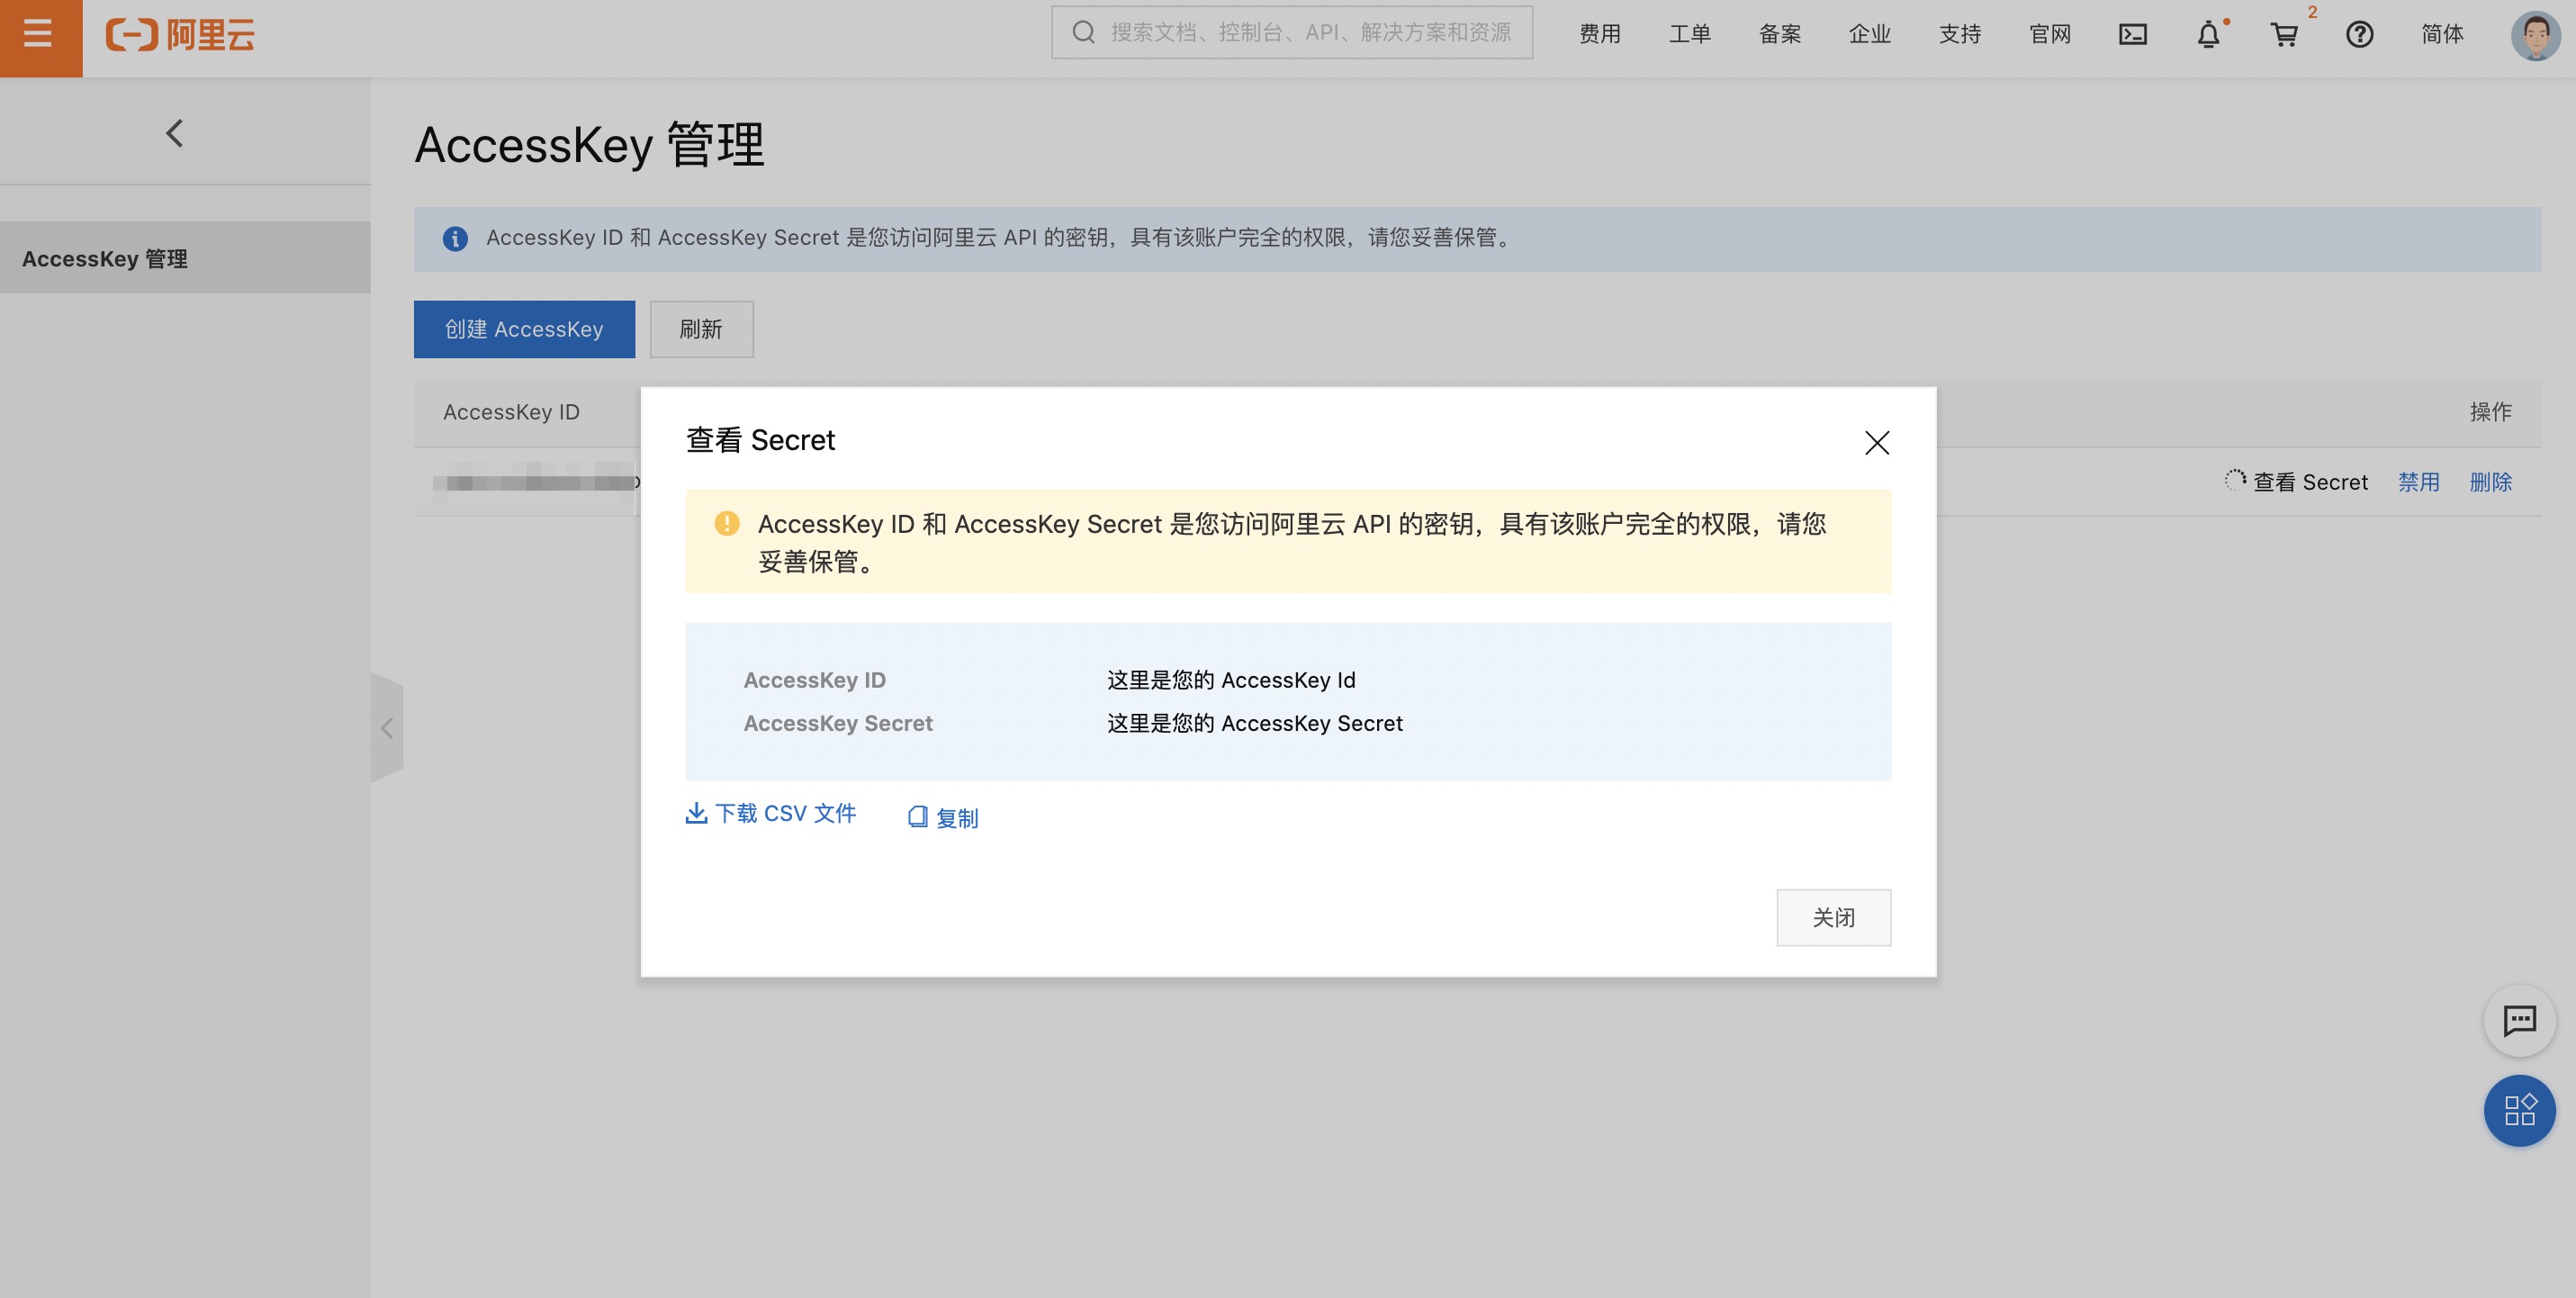
云账号 AccessKey 是您访问阿里云 API 的密钥,具有该账户完全的权限,请您务必妥善保管!不要通过任何方式(e.g. Github)将 AccessKey 公开到外部渠道,以避免被他人利用而造成 安全威胁 。
强烈建议您遵循 阿里云安全最佳实践 ,使用 RAM 子用户 AccessKey 来进行 API 调用。
-
执行
s命令:$ s ? No Serverless-Devs project is currently detected. Do you want to create a new project? (Y/n)
-
填写
y,并按回车,可以进入到创建引导部分:🚀 More applications: https://registry.serverless-devs.com ? Hello Serverless for Cloud Vendors (Use arrow keys or type to search) ❯ Alibaba Cloud Serverless AWS Cloud Serverless Tencent Cloud Serverless Huawei Cloud Serverless Baidu Cloud Serverless Dev Template for Serverless Devs
-
此时只需要选择对应的选项,按照引导进行操作,即可。例如选择
Alibaba Cloud Serverless,就可以看到阿里云Serverless产品下的应用模板分类:? Hello, serverlesser. Which template do you like? (Use arrow keys or type to search) ❯ Quick start Custom runtime example Container example Custom domain example
-
此时可以继续选择某分类下的具体应用进行初始化,例如选择
Quick start之后,可以看到该分类下的具体模板应用:? Which template do you like? (Use arrow keys or type to search) ❯ Node.js Python3 Java Go Dotnet
选择
Node.js即可完成创建,在引导的过程中,可能会出现填写项目名称以及选择密钥的过程:- 项目名称可以是:
start-fc-http-nodejs14 - 地域可以是:
cn-hangzhou - 函数名可以是:
start-fc-http-nodejs14 - nodejs 运行时可以是:
nodejs14 - 密钥可以选择我们上文中创建过的:
alibaba-access
例如:
🚀 More applications: https://registry.serverless-devs.com ? Hello Serverless for Cloud Vendors (Use arrow keys or type to search) ❯ Alibaba Cloud Serverless ? Hello Serverless for Cloud Vendors Alibaba Cloud Serverless ? Hello, serverlesser. Which template do you like? Quick start [Deploy a Hello World function to FaaS] ? Which template do you like? Node.js 😋 Create application command: [s init start-fc3-nodejs] ? Please input your project name (init dir) start-fc-http-nodejs14 Downloading[/v3/packages/start-fc3-nodejs/zipball/0.0.7]... Download start-fc3-nodejs successfully Serverless Devs Application Case Cloud services required: - FC : https://fc.console.aliyun.com/ Tips: - FC Component: https://github.com/devsapp/fc3/blob/master/docs/zh/readme.md 创建应用所在的地区 ? 地域 cn-hangzhou 只能包含字母、数字、下划线和中划线。不能以数字、中划线开头。长度在 1-128 之间。 ? 函数名称 start-fc-http-nodejs14 创建应用所在的地区 ? nodejs 运行时 nodejs14 ? please select credential alias alibaba-access * Before using, please check whether the actions command in Yaml file is available * Carefully reading the notes in s.yaml is helpful for the use of the tool * If need help in the use process, please apply to join the Dingtalk Group: 33947367 🏄 Thanks for using Serverless-Devs 👉 You could [cd ******/start-fc-http-nodejs14] and enjoy your serverless journey! 🧭️ If you need help for this example, you can use [s -h] after you enter folder. 💞 Document ❤ Star: https://github.com/Serverless-Devs/Serverless-Devs 🚀 More applications: https://registry.serverless-devs.com
- 项目名称可以是:
-
随后进入
./start-fc-http-nodejs14目录,使用s deploy进行项目部署,稍等片刻,可以看到部署结果:🚀 Result for [deploy] of [hello-world-app] ==================== hello_world: region: cn-hangzhou description: hello world by serverless devs functionName: start-fc-http-nodejs14 handler: index.handler internetAccess: true memorySize: 128 role: runtime: nodejs14 timeout: 30
此时我们已经成功部署了一个应用。可以前往函数计算控制台查看详情。
-
部署成功之后,我们可以使用
s invoke命令对该函数应用进行调用。例如:$ s invoke -e "{\"key\": \"val\"}" ⌛ Steps for [invoke] of [hello-world-app] ==================== ========= FC invoke Logs begin ========= FC Invoke Start RequestId: 1-6551e2b4-a057ee3a45ccf4f082ae5d2d load code for handler:index.handler FC Invoke End RequestId: 1-6551e2b4-a057ee3a45ccf4f082ae5d2d Duration: 4.14 ms, Billed Duration: 5 ms, Memory Size: 128 MB, Max Memory Used: 9.58 MB ========= FC invoke Logs end ========= Invoke instanceId: c-6551e2b5-f9c5c77480384d1aa28d Code Checksum: 11010102639495810358 Qualifier: LATEST RequestId: 1-6551e2b4-a057ee3a45ccf4f082ae5d2d Invoke Result: val ✔ [hello_world] completed (1.34s)