Homebridge on Raspberry Pi
This guide will show you how to run the oznu/homebridge docker image on a Raspberry Pi.
- Requirements
- Initial Raspberry Pi Setup
- Quick Install
- Manual Install
- Managing Homebridge
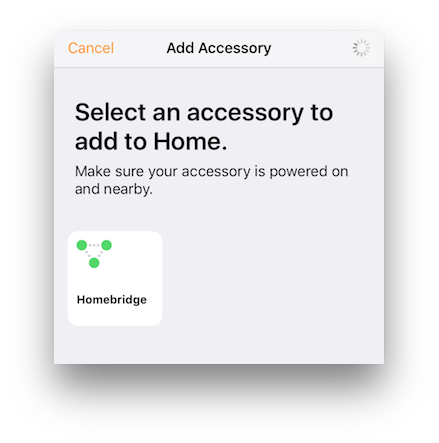
- Connect iOS / HomeKit
- Updating Homebridge
- Shell Access
- A Raspberry Pi 1 Model B or later (including Raspberry Pi Zero W)
- An SD Card
Get the latest copy of Raspbian Stretch Lite from the official Raspberry Pi website and image this to your SD card.
- Raspbian Stretch Lite is prefered as there is no need to run a GUI desktop.
- How to install Raspberry Pi Operating System Images
By default SSH access and WiFi are disabled in Raspbian. You can enable both these services before we boot from the SD card for the first time - this will avoid the need to ever connect a screen to the Pi.
The following changes to the freshly imaged SD card should be made on your computer before you plug the card into the Raspberry Pi for the first time.
To enable remote SSH access on first boot create an empty file called ssh in the root of the SD card.
If you have a Raspberry Pi with built in WiFi (Pi 3 or Zero W), you can configure WiFi on first boot. To do this create a file named wpa_supplicant.conf in the root of the SD card that contains the following (replace the YOUR_COUNTRY_CODE, YOUR_SSID and YOUR_PASSWORD values):
country=YOUR_COUNTRY_CODE
ctrl_interface=DIR=/var/run/wpa_supplicant GROUP=netdev
update_config=1

network={
    ssid="YOUR_SSID"
    scan_ssid=1
    psk="YOUR_PASSWORD"
    key_mgmt=WPA-PSK
}
Power on your Raspberry Pi and connect to the console using SSH.
If you're running macOS or have Bonjour for Windows (part of iTunes) installed, you should be able to connect using raspberrypi.local as the hostname. If not then you'll need to find out what IP address the Raspberry Pi was assigned and connect using that instead.
The default username is pi and password raspberry. You should change the default password now using the passwd command.
The quick install script will install Docker, Docker Compose, setup the docker-compose.yml file and start the docker container for you.
To run the quick install script:
curl https://raw.githubusercontent.com/oznu/docker-homebridge/master/raspbian-installer.sh -o get-homebridge.sh
chmod u+x get-homebridge.sh
./get-homebridge.sh
If you don't want to use the quick install script, you can manually run the steps below.
Install Docker from the official repository by running these commands:
curl -fsSL https://get.docker.com -o get-docker.sh
chmod u+x get-docker.sh
sudo VERSION=18.06 ./get-docker.sh
Add the pi user to the docker group:
sudo usermod -aG docker pi && logoutYou will need to logout of the Raspberry Pi and login again in order for your user to pick up the docker group membership.
Docker Compose allows you to easily create a manifest for your Docker containers. Since Docker Compose does not provide an official binary for ARM, you need to install it using Python:
sudo apt-get -y install python-setuptools && sudo easy_install pip && sudo pip install docker-compose
Create a new directory to store your homebridge docker-compose manifest and config data in. In this example we will install Homebridge in the pi user's home directory.
Create a new directory and change into it:
mkdir /home/pi/homebridge
cd /home/pi/homebridge
Create a new file called docker-compose.yml using nano:
nano docker-compose.yml
The contents of this file should be:
version: '2'
services:
  homebridge:
    image: oznu/homebridge:raspberry-pi
    restart: always
    network_mode: host
    volumes:
      - ./config:/homebridge
    environment:
      - PGID=1000
      - PUID=1000
      - HOMEBRIDGE_CONFIG_UI=1
- HOMEBRIDGE_CONFIG_UI_PORT=8080- The
restart: alwaysline instructs docker to setup the container so that it that will automatically start again if the Raspberry Pi is rebooted, or if the container unexpectedly quits or crashes. - The
network_mode: hostline instructs docker to share the Raspberry Pi's network with the container, allowing your iOS device to find the Homebridge accessory. - The
./config:/homebridgeinstructs docker to share the local folderconfigwith the container. This will allow you to recreate or update the docker container without losing any Homekit settings or Homebridge plugins. - For an explanation of the
PGIDandPUIDenvironment variables please see User & Group Identifiers. - The
HOMEBRIDGE_CONFIG_UIandHOMEBRIDGE_CONFIG_UI_PORTenable the homebridge-config-ui-x plugin. You can remove these two options if you don't want to use the UI.
Save and close the file by pressing CTRL+X.
Start the Homebridge Docker container by running:
docker-compose up -d
- It might take some time to download the initial image which is about 125 MB compressed.
- Docker will now download the latest oznu/homebridge docker image.
- The
-dflag tellsdocker-composeto run the container as a background process.
You'll probably want to view the Homebridge logs to check everything is working and to get the iOS pairing code:
docker-compose logs -f

Your Homebridge config.json, plugins and all HomeKit data will be stored in the newly created config directory.
To manage Homebridge go to http://<ip of raspberry pi>:8080 in your browser. For example, http://192.168.1.20:8080. From here you can install, remove and update plugins, modify the Homebridge config.json and restart Homebridge.
The default username is admin with password admin. Remember you will need to restart Homebridge to apply any changes you make to the config.json.

You can restart the container by running:
docker-compose restart homebridge
You should now be able to see the Homebridge as a new HomeKit accessory in the Apple iOS Home App. You can pair the device using the QR code displayed in the logs (see above) or in browser using the Homebridge UI.
If the QR code is not displaying correctly and you're using using iOS 11 you will need to select Don't have a Code or Can't Scan and then under the Manual Code heading select the Enter code... link.
To update Homebridge to the latest version you just need to pull the latest version of oznu/homebridge.
Download the latest oznu/homebridge image:
docker-compose pull homebridge
If a newer version of the image was downloaded, recreate the container using the new image by running the up command again:
docker-compose up -d
If you require shell access to the container you can run:
docker-compose exec homebridge sh