Note: This section will likely be updated and reorganized in a future blog post, however it is complete and should help you get an auth solution in place for your app.
Let's look at how to add user authentication with next-auth. NextAuth is a fantastic tool that removes a lot of the manual effort and management of the authentication process and leaves you with only the application specific behavior to configure.
It has long been said that you should never roll your own auth and while of course, like everything, the reality is more complex and every project must be evaluated with the requirements it has, it's good general advice overall.
User auth is a very complex topic, and if you are not experienced in it, making errors has a much higher risk than making errors in other areas of your application of exposing sensitive user data, which can obviously cause major issues.
NextAuth does support using your own managed credentials (storing your own users in your database) which is a great feature if your app requires it, but since we haven't even configured a database yet we're going to set up the auth in our app to allow users to login with common existing credentials like Google and Github.
Begin by installing next-auth.
yarn add next-auth
Unlike most of our recent tooling, this must exist during the runtime of our application, so it cannot be a devDependency.
First step is to add the auth handler to an api route. Create the directory structure /pages/api/auth and create a file with the odd sounding filename [...nextauth].ts inside of it with the following content:
pages/api/auth/[...nextauth].ts
import NextAuth, { Profile } from 'next-auth';
import GoogleProvider from 'next-auth/providers/google';

interface IGoogleProfile {
  email: string;
  email_verified: boolean;
  name: string;
  picture: `https://${string}`;
  given_name: string;
  family_name: string;
  locale: string; // Two character lowercase
  iat: number;
  exp: number;
}

if (!process.env.GOOGLE_CLIENT_ID || !process.env.GOOGLE_CLIENT_SECRET) {
  throw Error(
    'GOOGLE_CLIENT_ID and GOOGLE_CLIENT_SECRET must be defined in environment'
  );
}

export default NextAuth({
  // Configure one or more authentication providers
  providers: [
    GoogleProvider({
      clientId: process.env.GOOGLE_CLIENT_ID,
      clientSecret: process.env.GOOGLE_CLIENT_SECRET,
    }),
  ],
  callbacks: {
    async signIn({ account, profile }) {
      const googleProfile = profile as Profile & IGoogleProfile;
      if (account.provider === 'google') {
        return googleProfile.email_verified === true;
      }
      return true; // Do different verification for other providers that don't have `email_verified`
    },
  },
});
(Note that I have created my own interface above to show the shape of the current Google profile payload response data. This is not guaranteed to stay current if Google chooses to change their API in the future, so be aware, it is solely meant as a convenience.)
First we will need to add some secret environment variables the auth can use to get private information from our environment.
Create a file called .env.local. It's very important you use this exact naming pattern because this file is included in your .gitignore by default with the create-next-app configuration.
You must ensure this file is not included in your code repo when you commit.
If using VS Code you can do a sanity check and see that the filename should be greyed out compared to other files around it. It should also not appear in your source control tab showing files ready for staging.
Before we create the environment file we will need a randomized secret value for NextAuth to use. If on a unix system you should be able to simply run
openssl rand -hex 32
to generate a random value. If not you can use an online tool or method of your preference.
.env.local
NEXTAUTH_URL="http://localhost:3000"
NEXTAUTH_SECRET="YOUR_RANDOM_SECRET_VALUE"
Replace YOUR_RANDOM_SECRET_VALUE in the file above with the random string you generated. Remember that you are going to need to add this to your production environment as well, but we can do that later in the process.
We will begin with the Google provider. Relevant documentation is here and here and credentials/secrets can be obtained here.
Click "Credentials" then "Create Credentials" from the Google API console.
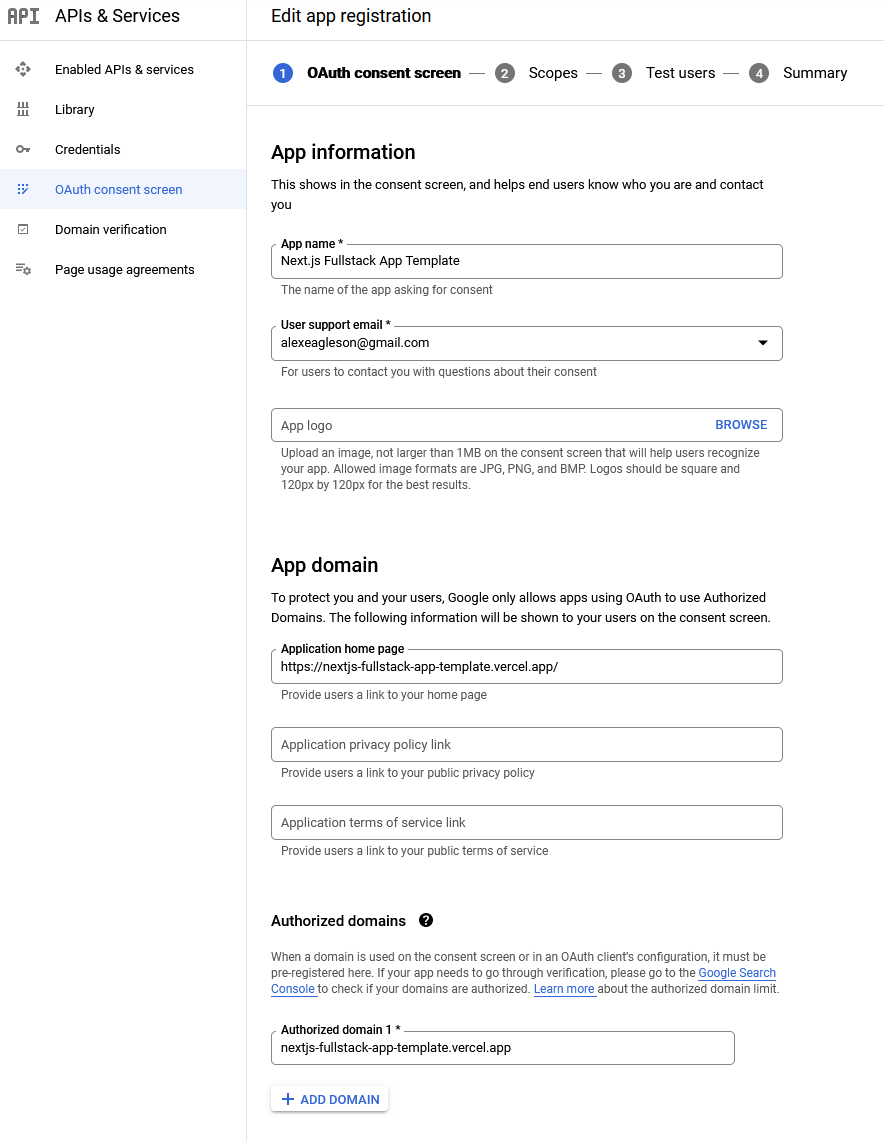
It may ask you to configure your "consent" screen in which case select "external".
Your form will look something like this. Google will not be able to redirect back to your local machine, so we'll be testing auth on your remote environment. If you've been following the full tutorial you will already have that configured for Vercel, so all you need to do is go to your Vercel dashboard and get the URL of your app.
If you are using another service for deployment the process should be nearly the same.
Next add whatever "scopes" you like. These are keys that refer to the info your app will be able to see about the user. In this case I have just selected userinfo.profile to get name, but there is other info you request as well.
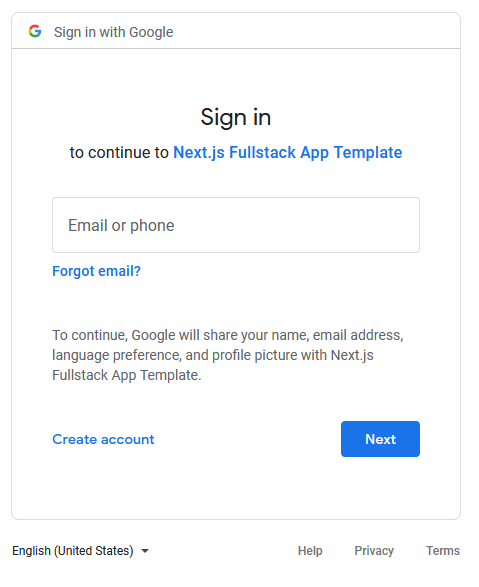
Depending on what you configure this is what controls what the user sees in terms of things like "This app wants access to your name, email, etc" when they login.
Once that is finished you can click "Publish App".
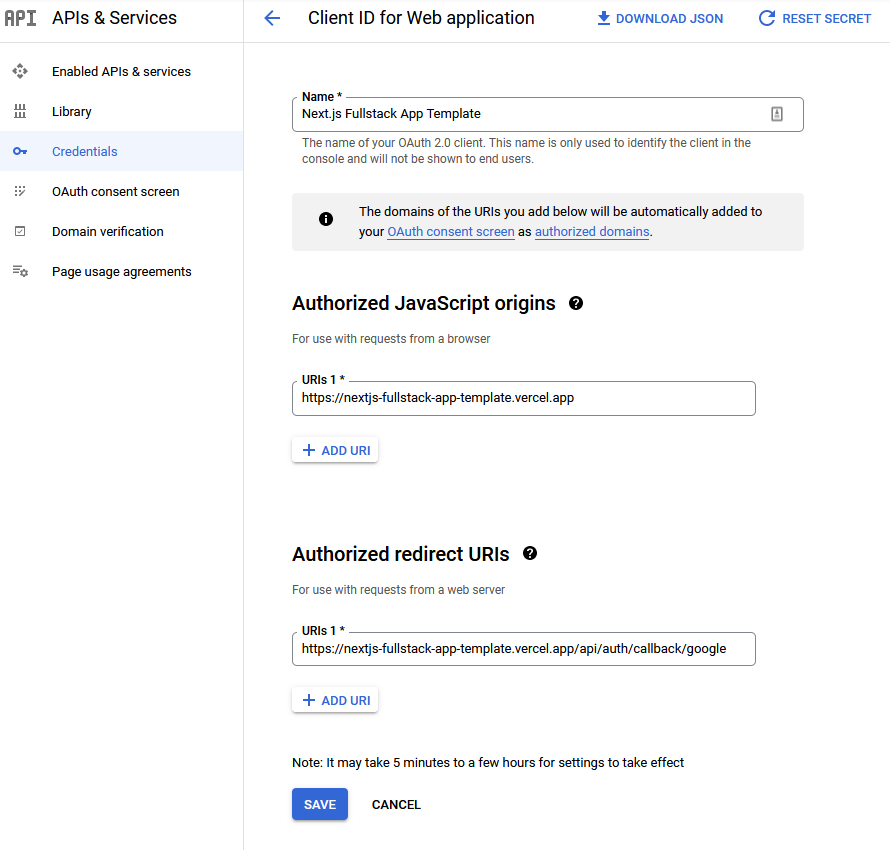
Now to get the actual credentials, click Credentials -> Create Credentials -> OAuth client ID
Fill out this screen in a similar fashion with your URL in place:
The default callback URL for NExtAUth and Google is your domain followed by /api/auth/callback/google
Once you have your GOOGLE_CLIENT_ID and GOOGLE_CLIENT_SECRET add them to your env:
.env.local
NEXTAUTH_URL="http://localhost:3000"
NEXTAUTH_SECRET="YOUR_RANDOM_SECRET_VALUE"

GOOGLE_CLIENT_ID="YOUR_PERSONAL_GOOGLE_CLIENT_ID"
GOOGLE_CLIENT_SECRET="YOUR_PERSONAL_GOOGLE_CLIENT_SECRET"
Obviously replacing the personal placeholders above with the values you get from your Google account.
Now we can get back to the client side. You need to wrap your application in NextAuth's <SessionProvider> component like so:
pages/_app.tsx
import { SessionProvider } from 'next-auth/react';
import type { AppProps } from 'next/app';
import '../styles/globals.css';

function MyApp({ Component, pageProps: { session, ...pageProps } }: AppProps) {
  return (
    <SessionProvider session={session}>
      <Component {...pageProps} />
    </SessionProvider>
  );
}

export default MyApp;
Then we can add a simple "Sign In" and "Sign Out" button to the homepage. You can move them to separate components later at your discretion.
pages/index.tsx
import type { NextPage } from 'next';
import { signOut, useSession } from 'next-auth/react';
import Head from 'next/head';
import Link from 'next/link';
import styles from '../styles/Home.module.css';

const Home: NextPage = () => {
  const { status } = useSession();

  return (
    <div className={styles.container}>
      <Head>
        <title>Create Next App</title>
        <meta name="description" content="Generated by create next app" />
        <link rel="icon" href="/favicon.ico" />
      </Head>

      <main className={styles.main}>
        <h1 className={styles.title}>
          Welcome to <a href="https://nextjs.org">Next.js!</a>
        </h1>

        {status === 'authenticated' ? (
          <>
            <p>Signed in</p>
            <button onClick={() => signOut()}>Sign Out</button>
          </>
        ) : (
          <Link href="/api/auth/signin">
            <a>Sign in</a>
          </Link>
        )}
      </main>
    </div>
  );
};

export default Home;
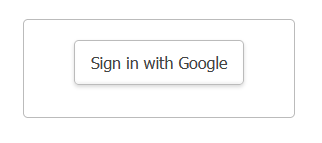
Make a commit to your project and push to your live production URL. Presuming you have properly configured that domain on your Google console then your login process will be as follows:
You can customize the above sign-in page to look however you like by creating your own Next page and adding the route to the NextAuth pages config in your [...nextauth].ts file.
And that's it! You now have basic authentication configured for your app. Trying refreshing and testing your logout button as well.
You can use the useSession() hook to check for auth, you can read and process your token on the server side. Spend some time with the NextAuth docs to cover all the different options you have for further development.
You can also add any number of additional auth providers, each one will have to be configured and secrets generated on those platforms, but they all follow the same basic process as Google. In fact most are even simpler.
For those using Storybook, you'll get a "not defined" error if you try to load up a component that uses the auth hooks. That's because we haven't wrapped our stories in the auth provider.
For this tutorial we are not going to worry about how to mock the actual authentication in Storybook, that's beyond the scope, but here's all you need to add to get your auth components back up and running in storybook in a default "logged out" state:
.storybook.preview.js
import { SessionProvider } from 'next-auth/react';

...

export const decorators = [
  (Story) => (
    <SessionProvider session={null}>
      <Story />
    </SessionProvider>
  ),
];

export const parameters = {
  ...
};
Just add a decorators export with a null session provider and you'll be in business.


