Audiobookshelf is a self-hosted audiobook server for managing and playing your audiobooks.
- Fully open-source, including the android & iOS app (in beta)
- Stream all audiobook formats on the fly
- Multi-user support w/ custom permissions
- Keeps progress per user and syncs across devices
- Auto-detects library updates, no need to re-scan
- Upload audiobooks w/ bulk upload drag and drop folders
- Backup your metadata + automated daily backups
- Progressive Web App (PWA)
- Chromecast support on the web app
- Fetch metadata and cover art from several sources
Is there a feature you are looking for? Suggest it
Join us on discord
Try it out on the Google Play Store
Available using Test Flight: https://testflight.apple.com/join/wiic7QIW - Join the discussion
See documentation for supported directory structure, folder naming conventions, and audio file metadata usage.
** Default username is "root" with no password
Available in Unraid Community Apps
docker pull advplyr/audiobookshelf

docker run -d \
  -e AUDIOBOOKSHELF_UID=99 \
  -e AUDIOBOOKSHELF_GID=100 \
  -p 13378:80 \
  -v </path/to/audiobooks>:/audiobooks \
  -v </path/to/config>:/config \
  -v </path/to/metadata>:/metadata \
  --name audiobookshelf \
--rm advplyr/audiobookshelf### docker-compose.yml ###
services:
audiobookshelf:
image: advplyr/audiobookshelf
ports:
- 13378:80
volumes:
- <path/to/your/audiobooks>:/audiobooks
- <path/to/metadata>:/metadata
- <path/to/config>:/configDebian package will use this config file /etc/default/audiobookshelf if exists. The install will create a user and group named audiobookshelf.
A PPA is hosted on github, add and install:
curl -s --compressed "https://advplyr.github.io/audiobookshelf-ppa/KEY.gpg" | sudo apt-key add -

sudo curl -s --compressed -o /etc/apt/sources.list.d/audiobookshelf.list "https://advplyr.github.io/audiobookshelf-ppa/audiobookshelf.list"

sudo apt update

sudo apt install audiobookshelf
or use a single command
curl -s --compressed "https://advplyr.github.io/audiobookshelf-ppa/KEY.gpg" | sudo apt-key add - && sudo curl -s --compressed -o /etc/apt/sources.list.d/audiobookshelf.list "https://advplyr.github.io/audiobookshelf-ppa/audiobookshelf.list" && sudo apt update && sudo apt install audiobookshelfGet the deb file from the github repo.
See instructions
Project directory: /usr/share/audiobookshelf/
Config file: /etc/default/audiobookshelf
System Service: /lib/systemd/system/audiobookshelf.service
Ffmpeg static build: /usr/lib/audiobookshelf-ffmpeg/
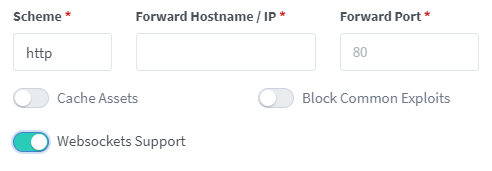
Toggle websockets support.
Add this to the site config file on your nginx server after you have changed the relevant parts in the <> brackets, and inserted your certificate paths.
server
{
        listen 443 ssl;
        server_name <sub>.<domain>.<tld>;

        access_log /var/log/nginx/audiobookshelf.access.log;
        error_log /var/log/nginx/audiobookshelf.error.log;

        ssl_certificate      /path/to/certificate;
        ssl_certificate_key  /path/to/key;

        location / {
                     proxy_set_header X-Forwarded-For    $proxy_add_x_forwarded_for;
                     proxy_set_header  X-Forwarded-Proto $scheme;
                     proxy_set_header  Host              $host;
                     proxy_set_header Upgrade            $http_upgrade;
                     proxy_set_header Connection         "upgrade";

                     proxy_http_version                  1.1;

                     proxy_pass                          http://<URL_to_forward_to>;
                     proxy_redirect                      http:// https://;
                   }
}Add this to the site config file on your Apache server after you have changed the relevant parts in the <> brackets, and inserted your certificate paths.
For this to work you must enable at least the following mods using a2enmod:
sslproxy_moduleproxy_wstunnel_modulerewrite_module
<IfModule mod_ssl.c>
<VirtualHost *:443>
    ServerName <sub>.<domain>.<tld>

    ErrorLog ${APACHE_LOG_DIR}/error.log
    CustomLog ${APACHE_LOG_DIR}/access.log combined

    ProxyPreserveHost On
    ProxyPass / http://localhost:<audiobookshelf_port>/
    RewriteEngine on
    RewriteCond %{HTTP:Upgrade} websocket [NC]
    RewriteCond %{HTTP:Connection} upgrade [NC]
    RewriteRule ^/?(.*) "ws://localhost:<audiobookshelf_port>/$1" [P,L]

    # unless you're doing something special this should be generated by a
    # tool like certbot by let's encrypt
    SSLCertificateFile /path/to/cert/file
    SSLCertificateKeyFile /path/to/key/file
</VirtualHost>
</IfModule>- Open Control Panel > Application Portal
- Change to the Reverse Proxy tab
- Select the proxy rule for which you want to enable Websockets and click on Edit
- Change to the "Custom Header" tab
- Click Create > WebSocket
- Click Save


