Thank you for your interest in contributing! We welcome all kinds of contributions, whether they are bug fixes, new features, documentation improvements, or any other suggestions. This guide will walk you through the process of contributing to FastStore framework.
Before you begin, make sure you have the following installed on your local machine to run the project:
If you don’t have write access to this repository, you'll need to fork it (else, skip this step):
Fork the repository (click the Fork button at the top right of this page).This will create a copy of the repository in your GitHub account.
- Open a terminal and clone the
faststorerepository. - Navigate into the project folder.
-
Run
yarnat the root of the repository. -
Run
yarn buildat the root of the repository. -
Run
yarn turbo run dev --filter={packageName}to run a package individually.
For example, if you want to run the
@faststore/corepackage, at the root of the repository run:
yarn turbo run dev --filter=@faststore/core
Note: If you encounter issues during the setup process, please check if your current version of Yarn, Turbo, and Node.js are matching the versions specified in the package.json file.
Before starting any work, create a new branch for your changes:
git checkout -b feat/your-branch-name
Choose a branch name that reflects the work being done, such as fix/query-typo or feat/add-new-component.
To test your changes in a store, you will need to create a pull request (for more guidance, refer to the next section). You can keep your pull request in draft while testing.
-
After committing your changes, push them to the remote repository and open a Pull Request.
-
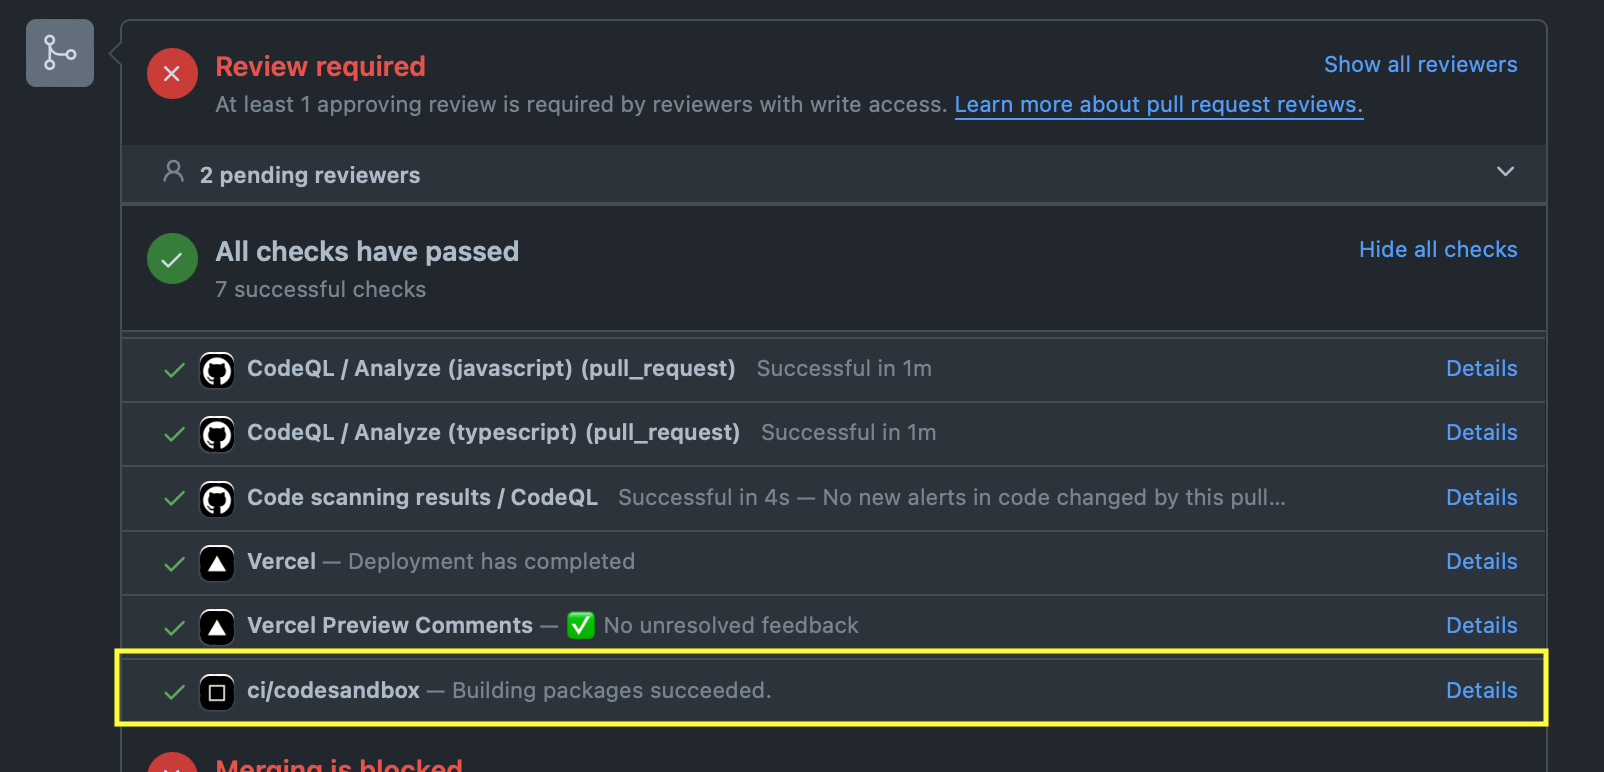
In the checks section, find
ci/codesandboxand click onDetails.
- Use the
Local Install Instructionsprovided for the PR to add your version of the packages as dependencies in thepackage.jsonfile of the starter or your store.
- Run
yarnto install the updates and test your changes in the store.
Note: This link is intended for testing purposes only. Please avoid using it in your store. Once the published version of your package is available, make sure to update the link accordingly.
We use Conventional Commits specification for pull request titles and commit messages.
After committing your changes, push them to the remote repository and open a Pull Request.
- Please add a clear and concise title PR title with one of the prefixes.
- Available prefixes:
Feat,Fix,Chore,Docs,Style - Example:
Feat: Add Carousel component
-
You will be presented with a pull request template. Please describe the motivation behind your changes and provide details about what you have implemented.
-
If applicable, include screenshots and steps for testing. This information will help reviewers understand your contributions better.
-
Add the
contributinglabel to identify your PR. And any other label that is applicable for your PR.
Note: If you believe your changes might cause a breaking change, or if you have any concerns about it, please mention this in the pull request description.
Once your PR is submitted, the team will review it.
Pull requests need only the approval 👍 of two or more maintainers to be merged.
All contributions will go through a review process. Make sure you keep an eye on the PR, you might need to:
- Respond to any feedback from reviewers.
- Make any requested changes by committing to your branch and pushing the updates.
Once your PR is approved, your changes will be merged into the main branch and a new release will be initiated, incorporating your updates into the latest version.
Please be patient, as this process can take some time depending on the team’s availability. However, if your changes are critical and you are a client, consider contacting customer support to request priority through a support ticket.
Thanks for contributing 🎉
